The Camera Admin tab, available from the Admin page of the Fleet Tracking Portal, offers a centralized location for performing basic administrative tasks associated with registered Driveri and Drive360/AIR II cameras.
Note: Your account must have active Driveri or Drive360/AIR II cameras, and users must have Camera Admin permissions.
Viewing Camera Devices
Camera devices are listed in a searchable, sortable table showing the vehicle label, the camera device equipped to it, and the device's serial number.
You can use the Search field to quickly locate a specific device.
You can use the Sort Ascending icon and Sort Descending icon available in each column to adjust the display of your camera devices.
Click the corresponding vehicle label under the Vehicle column.
The Camera details panel appears on the right-hand side of the page, offering the following information:
Vehicle label, device name, and device serial number
Overview:
Date/Time of last communication
Camera Settings
Media: All manually requested and auto-generated events associated with the vehicle
Note: Clips are available for 90 days. After 90 days, clips expire and are unavailable. We recommend downloading clips to local storage if you foresee a need for them after an extended period of time.
Click Edit to edit basic camera settings, if applicable.
Click View all media to view all media associated with the vehicle, if applicable.
Downloading a .CSV
You can download a .csv file containing the information available in the Camera Admin tab. The .csv file contains Vehicle, Device, and Serial number columns.
Managing Camera Settings
You can edit record settings (audio, road, driver), blur faces (none, driver, passenger, all) and enable or disable in-cab alerts from the Camera Admin tab.
Note: Any changes made to configurations are processed when the camera is on. If the camera is not on, the configuration change is held until the camera is on.
How to Edit Camera Settings
From the Camera Admin tab, click the Edit icon under the Actions column in the row of the applicable vehicle.
The Edit panel appears.
Under Record, click the checkboxes to adjust your recording settings.
Note: The camera must have a driver-facing camera to select the Driver option.
Use the toggle under In-cab alert to enable In-cab alerts (changes to blue) or disable In-cab alerts (changes to gray).
Click SaveChanges.
Camera Settings for AIR II with Fleet All-in-One Pro Plus
If you have the Fleet All-in-One (FAIO) Pro Plus plan, you can manage additional event settings beyond Record Type and In-Cab Alerts. For Road-Facing Camera Settings and Driver-Facing Camera Settings, you can either use the group toggle to turn recording on or off for all events under each camera type, or use the individual toggles to enable or disable recording for specific events. Please see the AIR II FAQ for event definitions and audio warnings.
Important! Setting changes are processed upon successful transmission to the device when it is in Wake mode. Therefore, if you make a change to settings, please allow for a couple of hours for the update to be enabled and reflected in your account.
Note: If you are interested in AI-based event recordings, please contact your Account Manager for additional information.
G-force Movement Events: All G-force-related events, such as acceleration, deceleration, or hard turns
Road Facing Camera Settings: - Forward Collision Warning (This feature is disabled by default; users with permissions can enable this from the Edit drawer of the Camera Admin tab.) - Close Following - Lane Departure (This feature is disabled by default; users with permissions can enable this from the Edit drawer of the Camera Admin tab.) - Stop Sign - Pedestrian Collision Warning (This feature is disabled by default; users with permissions can enable this from the Edit drawer of the Camera Admin tab.)
Driver Facing Camera Settings: - Drowsiness/Fatigue - Cell Phone Use - Distracted Driving - Seatbelt
Viewing Camera Media
You can view all camera media (manually requested and auto-generated) for a vehicle equipped with a camera.
How to View Camera Media for a Vehicle
From the Camera Admin tab, click the Overflow icon in the row of the applicable vehicle.
The View all media option appears.
Click View all media.
Note: You can also access View all media from the Camera Details panel.
A separate browser tab opens, navigating you to the Camera Media page. The vehicle is automatically selected, and the timeframe displayed defaults to Today. Available clips are shown under the Results list.
Use the Camera Media page filtering options to adjust as necessary.
(Skip this step if you have FAIO Pro Plus). Click Request clip to request a clip from the camera, or click the entry to view the clip if it was requested and transmitted from the camera previously.
Click the Play icon to view the playback.
[post_title] => About Camera Admin
[post_excerpt] =>
[post_status] => publish
[comment_status] => closed
[ping_status] => closed
[post_password] =>
[post_name] => about-camera-admin
[to_ping] =>
[pinged] =>
[post_modified] => 2026-04-02 08:32:09
[post_modified_gmt] => 2026-04-02 15:32:09
[post_content_filtered] =>
[post_parent] => 26617
[guid] => https://help.gpsinsight.com/?post_type=documentation&p=31997
[menu_order] => 0
[post_type] => documentation
[post_mime_type] =>
[comment_count] => 0
[filter] => raw
)
[1] => WP_Post Object
(
[ID] => 26617
[post_author] => 12
[post_date] => 2023-02-16 10:03:01
[post_date_gmt] => 2023-02-16 17:03:01
[post_content] => The Admin page is a centralized hub for administrative tasks and allows you to view and manage your account users, vehicle groups, drivers/driver groups, landmark groups, and cameras (if applicable) quickly and easily.
To view this page, you must have Full User Admin permissions.
From the Admin page, you can access the following tabs:
Admin: Users - The Users page allows you to add users, manage existing users, and shows a list of your account users.
Admin: Vehicle Groups - The Vehicle Groups tab allows you to add a new vehicle group, manage existing vehicle groups, and shows a list of existing vehicle groups
Admin: Drivers/Driver Groups - With the Drivers tab, view your existing drivers at a glance, add a new driver, manage existing drivers, and download a .csv list of drivers. With the Drivers Group tab, see your existing driver groups, add a new driver group, and manage existing driver groups.
Admin: DriverIDs - This tab is for customers with DriverID devices (e.g., keyfobs, RFID, etc.). With the DriverID tab, view assigned and unassigned DriverIDs with the ability to assign and unassign drivers.
Admin: Landmark - The Landmark tab gives you a centralized table view of all your landmarks, where you can search, sort, filter, create, edit, delete, and export landmarks.
Admin: Landmark Groups - The Landmark Groups tab allows you to add a landmark group, manage existing landmark groups, and shows a list of your account’s existing landmark groups.
Admin: Cameras - The Camera Admin tab, available from the Admin page of the Fleet Tracking Portal, offers a centralized location for performing basic administrative tasks associated with registered Driveri and Drive360[whitelabel tier="gpsi,full"]/AIR II [/whitelabel] cameras.
Advanced Administrative settings for Enterprise customers and customers with Advanced Administration cannot be accessed from the Admin tabs listed above. To access these settings, users can select the “Use Legacy Product” link available at the top of each Admin tab (excluding Camera Admin). This link redirects to the corresponding Admin page in Classic.
[post_title] => About the Admin Page
[post_excerpt] =>
[post_status] => publish
[comment_status] => closed
[ping_status] => closed
[post_password] =>
[post_name] => about-the-admin-page
[to_ping] =>
[pinged] =>
[post_modified] => 2026-09-08 10:22:49
[post_modified_gmt] => 2026-09-08 17:22:49
[post_content_filtered] =>
[post_parent] => 0
[guid] => https://help.gpsinsight.com/?post_type=documentation&p=26617
[menu_order] => 0
[post_type] => documentation
[post_mime_type] =>
[comment_count] => 0
[filter] => raw
)
[2] => WP_Post Object
(
[ID] => 30806
[post_author] => 12
[post_date] => 2024-05-29 10:10:21
[post_date_gmt] => 2024-05-29 17:10:21
[post_content] => The Drivers page allows you to add a new driver, manage existing drivers, and download a .csv list of drivers.
Viewing the Driver List
A list of existing drivers is displayed on the Drivers page showing the following driver information:
Reference ID (if applicable)
First Name
Last Name
Time Zone
Phone (if applicable)
Email (if applicable)
Message Preference (view the selected message preference for the driver - if applicable)
Assign Ct. (number of times the driver has been assigned to a vehicle)
Vehicle (current assigned vehicle - if applicable).
From this list, you can use the Actions column to assign the driver to a vehicle, edit the driver's information, add the driver to a driver group, remove the driver from a driver group, or delete the driver.
To download a copy of the driver list, please click the Download list button located toward the top-left corner of the Admin: Drivers tab.
Adding a Driver
How to add a driver:
From the Admin: Drivers tab, click + New driver.
The Create driver pop-up appears on the right-hand side of the browser.
Complete all applicable fields:
First Name (Required)
Last Name (Required)
Reference ID (Required)
Email (Required)
Phone (Add if you would like to contact the driver by SMS)
Country
Time zone
Alert Preference (check the box next to the preferred alert notification method: Email or SMS)
Driver Groups (use the drop-down to select applicable driver groups
Driveri Group (use the drop-down to select driveri group (if applicable)
Set toggle for Access Driveri mobile app (use the toggle to enable access to the Driveri mobile app for the driver, if applicable)
The Driveri product is an available safety camera add-on. If you are interested in learning more, please contact your Account Manager.
Click Save.
A notification confirming that the driver has been successfully added appears at the top right-hand side of the browser window.
Managing a Driver
How to edit a driver:
From the Admin: Drivers tab, locate the driver you would like to edit from the driver list and click the Edit icon from the Actions column.
The Edit pop-up appears on the right-hand side of the browser.
Make your edits and click Save.
If you are editing a driver and required fields appear incomplete in the Edit pop-up, you must complete any and all required fields before you can successfully click Save.
A notification confirming that your edits to the driver have been successfully saved appears at the top right-hand side of the browser window.
How to delete a driver:
From the Admin: Drivers tab, locate the driver you would like to edit from the driver list and click the Overflow Menu icon from the Actions column.
A pop-up menu with additional action options appears.
Click Delete.
The Delete Driver confirmation appears asking you to verify that you would like to delete the selected driver.
Click Yes, Delete to delete the driver or No, Cancel to exit without deleting the driver.
If you clicked Yes, Delete, a notification confirming that your have successfully delete the driver appears at the top right-hand side of the browser window.
How to add/remove a driver to/from vehicle assignment:
From the Admin: Drivers tab, locate the driver for which you would like to adjust driver assignment and click the Vehicle Assignment icon from the Actions column.
If the driver is not currently assigned to a vehicle, the pop-up shows the option: Assign to a vehicle. If the driver is currently assigned to a vehicle, the pop-up shows the options: 1) Remove driver from vehicle, 2) Reassign to a new vehicle.
Click on the option that describes what you would like to do.
Based on your selection:
If you selected Remove driver from vehicle, a pop-up appears asking you to confirm you would like to remove the driver from the currently assigned vehicle. Click Yes, Remove Driver to unassign the driver from the vehicle or No, Cancel to exit without performing any action.
If you selected Reassign to a new vehicle, a pop-up appears defining the currently assigned vehicle. Use the drop-down to search/select the new vehicle to assign to the driver then click Reassign.
If you selected Assign to a vehicle, a pop-up appears with a drop-down to select the vehicle to which you would like to assign the driver, then click Assign.
From the Admin: Drivers tab, locate the driver for which you would like to adjust membership to a driver group and click the Overflow Menu icon from the Actions column.
A pop-up appears with additional options.
To add the driver to a driver group, click Add to a driver group.
The Driver Groups pop-up appears on the right-hand side of the browser window.
Use the Search field to locate the driver group or you may also use the list view, then click the checkbox next to the desired driver group(s).
Click Save.
A notification confirming that you successfully added the driver to a driver group appears at the top right-hand side of the browser window.
To remove the driver from a driver group, click Remove from a driver group.
The Driver Groups pop-up appears on the right-hand side of the browser window.
Use the Search field to locate the driver group or you may also use the list view, then click the checkbox next to the driver group(s) to uncheck the box(es).
Click Save.
A notification confirming that you successfully removed the driver from a driver group appears at the top right-hand side of the browser window.
[post_title] => Adding & Managing Drivers
[post_excerpt] =>
[post_status] => publish
[comment_status] => closed
[ping_status] => closed
[post_password] =>
[post_name] => adding-managing-drivers
[to_ping] =>
[pinged] =>
[post_modified] => 2025-07-11 05:18:19
[post_modified_gmt] => 2025-07-11 12:18:19
[post_content_filtered] =>
[post_parent] => 26617
[guid] => https://help.gpsinsight.com/?post_type=documentation&p=30806
[menu_order] => 3
[post_type] => documentation
[post_mime_type] =>
[comment_count] => 0
[filter] => raw
)
[3] => WP_Post Object
(
[ID] => 26610
[post_author] => 12
[post_date] => 2023-02-16 09:54:34
[post_date_gmt] => 2023-02-16 16:54:34
[post_content] =>
Configurable devices use recommended (default) thresholds to alert drivers when certain driving behaviors are detected. These alerts are based on the selected Vehicle Class and include:
Rapid acceleration
Harsh braking
Hard right and left turns
Idling
Speeding
Vehicle Class Options
Note: Vehicle Class only applies to devices that track movement (e.g., XT-25, XT45, etc.). Any vehicles equipped with devices that do not track movement cannot have a Vehicle Class assigned (e.g., ST-600, solar/asset trackers, etc.).
Medium-Duty (10,000–26,000 lbs): Box trucks, school buses, tow trucks
Heavy-Duty (26,000+ lbs): Semi-trucks, garbage trucks, dump trucks, and heavy equipment
Default Vehicle Class Assignment
During the vehicle registration process (when you add a vehicle), vehicles are automatically assigned to the Light-Duty Vehicle Class unless you select a different option.
Each Vehicle Class includes its own set of default configuration settings, designed to align alert thresholds with the vehicle’s size and operating characteristics for optimized settings. Configuration settings also vary slightly between GPS tracking device manufacturers.
Device Manufacturer Configuration Settings
CalAmp
Class
Configuration
Light-Duty
Rapid Acceleration (g): 0.43 Hard Braking (g): -0.61 Hard Left/Right (g): 0.47
Medium-Duty
Rapid Acceleration (g): 0.36 Hard Braking (g): -0.54 Hard Left/Right (g): 0.4
Heavy-Duty
Rapid Acceleration (g): 0.29 Hard Braking (g): -0.47 Hard Left/Right (g): 0.32
Xirgo
Class
Configuration
Light-Duty
Rapid Acceleration (g): 0.43 Hard Braking (g): -0.61 Hard Left/Right (g): 0.47
Medium-Duty
Rapid Acceleration (g): 0.36 Hard Braking (g): -0.54 Hard Left/Right (g): 0.4
Heavy-Duty
Rapid Acceleration (g): 0.29 Hard Braking (g): -.0.47 Hard Left/Right (g): 0.32
Geotab
Class
Configuration
Light-Duty
Rapid Acceleration (g): 0.43 Hard Braking (g): -0.61 Hard Left/Right (g): 0.47
Medium-Duty
Rapid Acceleration (g): 0.36 Hard Braking (g): -0.54 Hard Left/Right (g): 0.4
Heavy-Duty
Rapid Acceleration (g): 0.29 Hard Braking (g): -.0.47 Hard Left/Right (g): 0.32
Waylens
Class
Configuration
Light-Duty
Harsh Accel Threshold: 275 Harsh Brake Threshold: -315 Harsh Turn Threshold: 340 Severe Accel Threshold: 305 Severe Brake Threshold: -345 Severe Turn Threshold: 375
Medium-Duty
Harsh Accel Threshold: 245 Harsh Brake Threshold: -290 Harsh Turn Threshold: 300 Severe Accel Threshold: 275 Severe Brake Threshold: -320 Severe Turn Threshold: 335
Heavy-Duty
Harsh Accel Threshold: 210 Harsh Brake Threshold: -260 Harsh Turn Threshold: 255 Severe Accel Threshold: 240 Severe Brake Threshold: -290 Severe Turn Threshold: 290
Netradyne
Class
Class Category
Light-Duty
Class 1 (see below)
Medium-Duty
Class 4 (see below)
Heavy-Duty
Class 7 (see below)
Adjusting Device Configuration Thresholds
You can adjust device configuration thresholds by selecting a different Vehicle Class when editing a vehicle.
Note: Because these are device-level hardware settings, changing device configuration requires the device to restart; therefore, adjust these settings infrequently and during off hours as much as possible.
Vehicles can be edited in either of the following locations:
Map Page: Select the Edit button from the vehicle’s card
Admin: Vehicles: Select the Edit button in the Actions column for the vehicle
Updating the Vehicle Class applies the corresponding default thresholds for that class.
Setting Custom Configuration
You may create a new configuration using the Custom Configuration option for CalAmp devices only. However, we recommend only customizing if you have unique device requirements. A custom configuration can be created from the Map Page or the Admin: Vehicle tab.
Note: Custom configurations cannot be created when adding a vehicle to your account.
Map Page Custom Configuration
Navigate to the Map Page by clicking the Map icon from the Navigation Bar.
Locate the applicable vehicle using the Search field, filtering, or by looking through the Vehicle List, then click on the vehicle.
The Vehicle Card appears, showing vehicle details.
Click Edit.
The Edit vehicle panel displays.
Scroll to the Vehicle Information section, then under Vehicle Class, use the drop-down and click Custom configuration.
Click Continue to custom configuration.
Click + Create new configuration to create a saved configuration that can be reused for other devices. Alternatively, select "Customize this device" in the Configuration section to apply a configuration specific to the selected vehicle’s device.
Note: Minimum violation type thresholds are as follows: Rapid Acceleration: .20g Hard Braking: .20g Hard Left/Right: .30g Idling: 30 seconds Speeding: 5mph
Create New Configuration: From the Add new configuration pop-up, enter a name for the Configuration, then adjust the values under the Threshold columns for applicable violation types. Click Add when finished.
Customize This Device: From the table in the Configure Device panel, adjust the values under the Threshold columns for applicable violation types, then click Select. The Edit Vehicle panel appears, then click Save changes to save the changes to the configuration settings.
A pop-up confirming the configuration was added/saved successfully appears in the top-right corner of the screen.
Admin: Vehicles Tab Custom Configuration
Note: A user must have Vehicle Admin permission enabled to access this tab.
Navigate to the Admin: Vehicles tab by hovering over the Admin icon from the Navigation Bar and clicking Vehicles from the expanded menu.
Locate the applicable vehicle using the Search bar, filtering options, or by looking through the table rows.
Click the Edit button in the Actions column of the applicable row corresponding to the vehicle.
Scroll down to the Vehicle Class section, and click Continue to custom configuration.
The Configure device panel displays.
Click + Create new configuration to create a saved configuration that can be reused for other devices. Alternatively, select "Customize this device" in the Configuration section to apply a configuration specific to the selected vehicle’s device.
Note: Minimum violation type thresholds are as follows: Rapid Acceleration: .20g Hard Braking: .20g Hard Left/Right: .30g Idling: 30 seconds Speeding: 5mph
Create New Configuration: From the Add new configuration pop-up, enter a name for the Configuration, then adjust the values under the Threshold columns for applicable violation types. Click Add when finished.
Customize This Device: From the table in the Configure Device panel, adjust the values under the Threshold columns for applicable violation types, then click Select.
The Edit Vehicle panel appears, then click Save changes to save the changes to the configuration settings.
A pop-up confirming the configuration was added/saved successfully appears in the top-right corner of the screen.
Accessing the Device Threshold Configuration Page
To set new default thresholds for your organization, users with Vehicle Admin permissions can use the Device Threshold Configuration page. This page is available only to Advanced Administration/Enterprise customers with configurable devices (CalAmp only) and can be found in Advanced Administration (Classic Portal).
Note: Because these are device-level hardware settings, changing device configuration requires the device to restart; therefore, adjust these settings infrequently and during off-hours as much as possible.
From the Device Threshold Configuration page, you can:
Edit or delete existing configuration thresholds
Apply preferred default thresholds to multiple applicable devices
Set custom configuration settings for individual devices
View, update, or manage device configurations for one or more vehicles
Create new configuration profiles for your account
To Access the Device Threshold Configuration Page
Click the Advanced Administration icon from the Navigation Bar.
The Advanced Administration portal displays.
Click Account, then click Manage Vehicles under Admin in the drop-down. Under Additional Options, click Configure device thresholds.
The Device Threshold Configuration page appears.
The Configurations on the right may not show what thresholds your devices were or are currently programmed with.
Creating, Editing, and Deleting Configurations
To create a new configuration:
From the Configurations area, click New+.
The Create a new PNP Configuration window appears.
Thresholds displayed in the window automatically are the minimum values that can be entered.
Enter a name for the new configuration and the preferred threshold values.
Idling values are limited to 30-second increments.
Click the Save button.
The new configuration is displayed in the Configurations area.
To Edit a Device Threshold Configuration:
From the Configurations area, use the drop-down window to select the device threshold you would like to edit.
Click the Edit button.
The selected configuration detail window appears.
Enter one or more new preferred thresholds.
Click the Save button.
The new threshold values are displayed in the Configurations area.
To Delete a Device Threshold Configuration:
From the Configurations area, use the drop-down window to select the device threshold you would like to delete.
Click the Delete button.
The Delete Configuration prompt appears.
Click the Delete Configuration button.
The configuration is removed from your list of device configurations.
Assigning, Changing, and Viewing Configurations on Vehicles
To Assign/Change a Configuration to a Vehicle:
Locate the vehicle in the Configurable Devices area in the list or using the Search bar.
Click the Assign a Configuration icon ().
The Assign Configuration window appears. You can select a preset configuration with the Select a Configuration button or create a one-time configuration to send to this device with the Custom Configuration button.
If selecting a configuration to assign, use the drop-down window to select the preferred configuration. If creating a one-time configuration to send, enter the preferred threshold values.
Click the Save button.
The device updates with the newly assigned configuration as of vehicle ignition on.
To Assign/Change a Configuration to Multiple Vehicles
From the Configurable Devices area, click the Configure Multiple Devices checkbox ().
Use the drop-down window to select a configuration to assign to multiple vehicles.
Check the boxes for individual vehicles or click the Check All button () to automatically check the box for all vehicles.
Click the Save Assignments button.
To View Configurations on a Device:
Click the Download Settings from Device icon ().
The download contains the current device threshold settings.
Click on the Device Configuration next to the vehicle's serial number.
The vehicle row expands displaying the assigned configuration threshold and the current device threshold settings downloaded from the device.
Buzzer Feature
The GPSI-5000s with vPOD for diagnostics device includes an optional buzzer feature.
The GPSI-5000 (with vPOD for diagnostics) buzzer feature is not built in; however, it can be included as an accessory. This feature must be requested during installation if desired.
The Driving Violations Summary provides an overview of in-cab alert notifications when a vehicle/vehicle group violates acceptable thresholds for the selected vehicle/vehicle group and the Driving Violations Detail contains the time the alert occurred, cause of the alert, and more.
To view these reports, please use the instructions here: Running Reports.
The Application Access feature is available for our Fleet Management customers with the Driveri solution add-on who have enabled Single Sign On (SSO). Please refer to About the App Switcher for details on enabling SSO.
Note: Users must have Admin permissions to access the Application Access feature.
Viewing Application Access
Adding Application Access
How to Add Application Access:
From the Classic Portal, click More.
Click Driveri Cameras, then click Manage user app access.
The Admin: Users page is shown.
From the Actions column of the Admin: Users tab, click App access in the row corresponding to the applicable user.
In the User application access pop-up, click the toggle under "Driveri."
The pop-up expands with required fields, complete the required fields:
Driveri username: Input a username or select a pre-existing name.
If this is greyed out, the username currently auto-populating the field is the only username available to assign from the Driveri platform.
Driveri user role: Use the drop-down to select a user role to apply to the user. If you'd like details on Driveri user roles, please see Driveri Portal User Roles.
Driveri group: Enter any applicable Driveri group(s) for the user.
A message highlighted in red appears if the user's account requires editing before adding application access. Please complete the applicable action(s) required.
Click Save and apply.
Managing Application Access
You can easily edit and/or remove user application access from the Admin: Users tab.
Editing Application Acess
You can edit a user's username, Driveri user role, and/or Driveri group.
You can edit a user's username in the Driveri username field only if there are available usernames in the drop-down field.
How to Edit Application Access:
From the Classic Portal, click More.
Click Driveri Cameras, then click Manage user app access.
The Admin: Users page is shown.
From the Actions column of the Admin: Users tab, click App access in the row corresponding to the applicable user.
The User application access pop-up appears.
Make your edits in the available fields.
Click Save and apply.
Removing Application Access
How to Remove Application Access:
From the Classic Portal, click More.
Click Driveri Cameras, then click Manage user app access.
The Admin: Users page is shown.
From the Actions column of the Admin: Users tab, click App access in the row corresponding to the applicable user.
The User application access pop-up appears.
Click the toggle under "Driveri."
Click Save and apply.
[post_title] => Managing Application Access
[post_excerpt] =>
[post_status] => publish
[comment_status] => closed
[ping_status] => closed
[post_password] =>
[post_name] => managing-application-access
[to_ping] =>
[pinged] =>
[post_modified] => 2025-01-28 10:29:19
[post_modified_gmt] => 2025-01-28 17:29:19
[post_content_filtered] =>
[post_parent] => 0
[guid] => https://help.gpsinsight.com/?post_type=documentation&p=31879
[menu_order] => 0
[post_type] => documentation
[post_mime_type] =>
[comment_count] => 0
[filter] => raw
)
[5] => WP_Post Object
(
[ID] => 26522
[post_author] => 12
[post_date] => 2023-02-07 10:15:20
[post_date_gmt] => 2023-02-07 17:15:20
[post_content] => [whitelabel tier="gpsi"]You can transfer or swap a device from the Vehicle Card Header on the Portal Map page. This is helpful in case you need to retire a vehicle and replace it with another one or no longer need the vehicle in the fleet.
You may transfer a device to a different vehicle. This may be helpful if you are retiring the vehicle from the fleet or if you are rotating vehicles based on seasonal/situational use.
Transferring a device to another vehicle requires you to register the device to another vehicle immediately after making the selection to transfer.
How to transfer a device:
From the Vehicle Card, click the ellipsis icon ().
The Vehicle Card Header menu appears.
Click Transfer Device.
The Transfer Device page appears.
As you are required to register the device, enter the following information:
Required: Vehicle Label
Required: VIN
Year
Make
Model
Color
Icon (Use the drop-down to make a selection)
Required: Country (Use the drop-down to make a selection)
License State (Use the drop-down to make a selection)
License Plate
Required: Odometer
Runtime
Fuel Type
Fuel Capacity
Engine Size (L)
Idle GPH
Click Transfer.
A pop-up appears asking you to confirm you would like to transfer the device.
Click Yes, Transfer.
If successful, a pop-up appears confirming the device has been successfully transferred.
Swapping a Device
Swap allows users to quickly swap a new device serial number into an existing vehicle/asset registration. This feature is valuable for instances where devices are upgraded or replaced through RA.
By selecting Swap, the user will have the option to copy the full vehicle profile (vehicle info, associated groups and hierarchy, attributes, inputs, current driver assignment, and scheduled alerts and reports).
How to Swap a Device:
From the Vehicle Card, click the ellipsis icon ().
The Vehicle Card Header menu appears.
Click Swap Device.
The Swap Device page appears.
Select a device serial number using the drop-down or you can begin typing the serial number to locate the device serial number.
Check the box next to Copy Vehicle Profile if you would like to copy the full vehicle profile.
Click Swap.
A pop-up appears asking you to confirm you would like to swap the device.
Click Yes, Swap.
If successful, a pop-up appears confirming the device has been successfully swapped.
Swapping a device requires action from the Support team. The Swap Form in the portal automatically notifies Support of the request. Support will notify you when your swap request is complete. Please note that devices remain on the account until the end of the month. Request by the 26th of each month to avoid an additional month of billing.
[/whitelabel]
[whitelabel tier="limited,full"]You can transfer or swap a device from the Vehicle Card Header on the Portal Map page. This is helpful in case you need to retire a vehicle and replace it with another one.
To perform a device transfer, swap, or deactivation, the user must have Vehicle Admin permission.
Transferring a Device
You may transfer a device to a different vehicle. This may be helpful if you are retiring the vehicle from the fleet or if you are rotating vehicles based on seasonal/situational use.
Transferring a device to another vehicle requires you to register the device to another vehicle immediately after making the selection to transfer.
How to transfer a device:
Not all features displayed in the gif above are available for all customers. If you have a question, please reach out to Support and/or your Account Manager.
From the Vehicle Card, click the ellipsis icon ().
The Vehicle Card Header menu appears.
Click Transfer Device.
The Transfer Device page appears.
As you are required to register the device, enter the following information:
Required: Vehicle Label
Required: VIN
Year
Make
Model
Color
Icon (Use the drop-down to make a selection)
Required: Country (Use the drop-down to make a selection)
License State (Use the drop-down to make a selection)
License Plate
Required: Odometer
Runtime
Fuel Type
Fuel Capacity
Engine Size (L)
Idle GPH
Click Transfer.
A pop-up appears asking you to confirm you would like to transfer the device.
Click Yes, Transfer.
If successful, a pop-up appears confirming the device has been successfully transferred.
Swapping a Device
Swap allows users to quickly swap a new device serial number into an existing vehicle/asset registration. This feature is valuable for instances where devices are upgraded or replaced through RA.
By selecting Swap, the user will have the option to copy the full vehicle profile (vehicle info, associated groups and hierarchy, attributes, inputs, current driver assignment, and scheduled alerts and reports).
How to Swap a Device:
Not all features displayed in the gif above are available for all customers. If you have a question, please reach out to Support and/or your Account Manager.
From the Vehicle Card, click the ellipsis icon ().
The Vehicle Card Header menu appears.
Click Swap Device.
The Swap Device page appears.
Select a device serial number using the drop-down or you can begin typing the serial number to locate the device serial number.
Check the box next to Copy Vehicle Profile if you would like to copy the full vehicle profile.
Click Swap.
A pop-up appears asking you to confirm you would like to swap the device.
Click Yes, Swap.
If successful, a pop-up appears confirming the device has been successfully swapped.
Swapping a device requires action from the Support team. The Swap Form in the portal automatically notifies Support of the request. Support will notify you when your swap request is complete. Please note that devices remain on the account until the end of the month. Request by the 26th of each month to avoid an additional month of billing.
[/whitelabel]
[post_title] => Managing Devices: Transfer and Swap
[post_excerpt] =>
[post_status] => publish
[comment_status] => closed
[ping_status] => closed
[post_password] =>
[post_name] => managing-devices-transfer-and-swap
[to_ping] =>
[pinged] =>
[post_modified] => 2024-12-03 08:13:25
[post_modified_gmt] => 2024-12-03 15:13:25
[post_content_filtered] =>
[post_parent] => 0
[guid] => https://help.gpsinsight.com/?post_type=documentation&p=26522
[menu_order] => 0
[post_type] => documentation
[post_mime_type] =>
[comment_count] => 0
[filter] => raw
)
[6] => WP_Post Object
(
[ID] => 31807
[post_author] => 12
[post_date] => 2025-01-06 09:48:47
[post_date_gmt] => 2025-01-06 16:48:47
[post_content] => Would you like to order more devices for your evolving fleet? Great! You can initiate your order directly from the Fleet Management Portal.
You must have Admin permissions to order more devices via the Fleet Management Portal.
To Initiate an Order
Log in to the Fleet Management Portal with valid Admin user credentials.
Navigate to the Explore page.
Click Order More Devices.
The Order More Devices page appears.
Enter your Business Website Domain and Business Email Address, then click Submit.
A new page appears requesting details for your order.
If the business email address you entered matches what we have on file, some of the fields on this page may be auto-populated with information from your current account.
Complete/update the following fields as needed:
Company Name
First Name
Last Name
Phone
Email
Number of Vehicle Trackers
Number of Asset Trackers
Number of Dash Cameras
Shipping Method
Installation Type
Shipping Address: Street Address, Address Line 2, City, State, ZIP Code
Click Submit.
A confirmation that your form has been submitted will appear thanking you for contacting us and stating that a Customer Success Team member will contact you within 1 business day of your submission.
[post_title] => Ordering More Devices
[post_excerpt] =>
[post_status] => publish
[comment_status] => closed
[ping_status] => closed
[post_password] =>
[post_name] => ordering-more-devices
[to_ping] =>
[pinged] =>
[post_modified] => 2025-01-09 10:30:11
[post_modified_gmt] => 2025-01-09 17:30:11
[post_content_filtered] =>
[post_parent] => 0
[guid] => https://help.gpsinsight.com/?post_type=documentation&p=31807
[menu_order] => 0
[post_type] => documentation
[post_mime_type] =>
[comment_count] => 0
[filter] => raw
)
[7] => WP_Post Object
(
[ID] => 30599
[post_author] => 12
[post_date] => 2024-03-13 10:32:36
[post_date_gmt] => 2024-03-13 17:32:36
[post_content] => From the Explore page of the Fleet Tracking Portal, you can schedule an installation using our partner, Techsbook.
This feature is only available to US-based customers.
To Schedule an Installation:
From the Explore page, click Schedule an Install under the Administration section.
A Customer Acknowledgement pop-up appears.
Please read the acknowledgment, then click Proceed to agree to the acknowledgment.
You are navigated to Techsbook's website.
If you are a first-time user, you will be prompted to set up an account by clicking Get started. For returning customers, click Schedule tech to begin the scheduling process.
The Public Map Links feature allows you to create a URL link to view vehicle locations on a map for a specific vehicle group. This enables external visibility of limited vehicle location data, allowing your customers to view real-time positions without requiring a login to the portal.
Additionally, you can include a Landmark Group to be shared along with the vehicle group's locations.
Customers can interact with the Public Map by viewing vehicle lists, centering on selected vehicles, adjusting map style and trail overlays, and using standard map controls such as zoom, pan, fullscreen, and Street View.
A Vehicle Status legend is available to provide at-a-glance insight into each vehicle's status on the map.
Note: These external maps are publicly facing. They do not require being an authenticated user to see vehicle locations. Customers should be aware that any vehicle locations shared with this tool will be visible to anyone, and we will not be held responsible for any issues that may arise from sharing potentially sensitive information.
Note: The following items are required to access and create Public Map Links: - At least one vehicle group configured - Admin permissions
Admin: Vehicle Groups Tab
From the Admin: Vehicle Groups tab, locate the row of the applicable vehicle group in the table. Note: You can use the ascending/descending arrows in the Group header to sort your vehicle groups by ascending or descending alphabetical order; however, you may need to tab through pages located at the bottom-right of the screen to locate a vehicle group.
Under the Shared Maps column, click the toggle corresponding to the vehicle group's row.
A pop-up message appears with the following privacy warning:
"You're about to enter or share personal information.
Please ensure that any data you provide — whether about yourself, an employee, or one of your customers — is shared in compliance with all applicable privacy laws and company policies.
Do not share sensitive personal data unless it is necessary and you have appropriate consent. By proceeding, you acknowledge that you understand and accept responsibility for the information you provide."
To continue, click I Understand & Proceed. To exit, click Cancel.
A pop-up appears confirming the link for the shared map has been created successfully, and the link has been copied to your clipboard. The toggle color changes from grey to blue when enabled.
If you would like to add a landmark group to the shared map, click the Edit icon after you have set the toggle to Shared. See steps under Managing a Public Map Link - Admin: Vehicle Groups tab.
Vehicle Group Card - Map Page
From the Map Page, locate and select the vehicle group by clicking on a vehicle group from the map, or use the Search field.
The Vehicle Group Card appears.
Click Share.
The Enable Sharing pop-up appears.
Under "Sharing," click the toggle to "ON."
A pop-up message appears with the following privacy warning:
"You're about to enter or share personal information.
Please ensure that any data you provide — whether about yourself, an employee, or one of your customers — is shared in compliance with all applicable privacy laws and company policies.
Do not share sensitive personal data unless it is necessary and you have appropriate consent. By proceeding, you acknowledge that you understand and accept responsibility for the information you provide."
To continue, click I Understand & Proceed. To exit, click Cancel.
If you have selected to continue, the Enable Sharing pop-up appears again—the "Sharing" toggle color changes from grey to blue.
Optional: Use the drop-down to add a landmark group for the shared map.
Click Enable Sharing.
A pop-up appears confirming the link for the shared map has been created successfully, and the link has been copied to your clipboard.
Managing a Public Map Link
You can copy, edit, or preview the link in a new browser tab after creating a shared link through the Admin: Vehicle Groups tab or by selecting the applicable vehicle group from the Map Page.
Admin: Vehicle Groups Tab
From the Admin: Vehicle Groups tab, locate the row of the applicable vehicle group in the table. Note: You can use the ascending/descending arrows in the Group header to sort your vehicle groups by ascending or descending alphabetical order; however, you may need to tab through pages located at the bottom-right of the screen to locate a vehicle group.
Under the Shared Maps column, corresponding to the vehicle group's row, click the Copy to Clipboard icon to copy the URL to your clipboard or click the Edit icon to edit the shared link (options: toggle on/off sharing or add/change/remove the landmark group for the shared link).
If you edited the shared link, click Save Changes to save your changes. A success message appears confirming your changes were saved successfully.
Vehicle Group Card - Map Page
From the Map Page, locate and select the vehicle group by clicking on a vehicle group from the map, or use the Search field.
The Vehicle Group Card appears.
Click Sharing.
A drop-down menu appears with the following options:
Copy shareable link: Copy the link to your clipboard.
Edit: Adjust the Sharing toggle to OFF or add/change/remove (select "(none)") a landmark group for the shared link.
Preview link in new window: View the public map available through the shared link in a separate browser tab.
Click one or more of the options above to manage your shared link.
Disabling a Public Map Link
You can disable a shared link at any time through the Admin: Vehicle Groups tab or by selecting the applicable vehicle group from the Map Page.
Admin: Vehicle Groups Tab
From the Admin: Vehicle Groups tab, locate the row of the applicable vehicle group in the table. Note: You can use the ascending/descending arrows in the Group header to sort your vehicle groups by ascending or descending alphabetical order; however, you may need to tab through pages located at the bottom-right of the screen to locate a vehicle group.
Under the Shared Maps column, corresponding to the vehicle group's row, click the toggle to off.
The toggle turns gray and slides to the left. A success message confirms the share link was successfully disabled.
Vehicle Group Card - Map Page
From the Map Page, locate and select the vehicle group by clicking on a vehicle group from the map, or use the Search field.
The Vehicle Group Card appears.
Click Sharing.
A drop-down menu appears.
Click Disable sharing.
A pop-up appears stating: "Disable sharing? This Vehicle Group will not longer be shared with the public. You can still make edits and share this Vehicle Group again."
Click Disable. Note: If you would like to exit the pop-up without disabling the shared link, click the X button at the top-right of the pop-up.
A success message appears confirming the shared link was successfully disabled.
Engaging with the Public Map
The following map interactions are available with Public Maps:
View a list of vehicles included in the vehicle group
Click on a vehicle from the list to center the map over that vehicle.
Hover over the vehicle icon to see high-level information: vehicle label, location, and vehicle status.
The DriverIDs tab in the Admin Page is available to customers with DriverID key fobs, iButton, Bluetooth fobs, and/or RFIDs and provides an overview of both assigned and unassigned DriverIDs. It displays associated drivers by reference numbers (RefID) and tracks how many times a DriverID has been used within the week to assign a driver to a vehicle. Additionally, this tab allows you to assign or unassign DriverIDs as needed.
Accessing the Admin: DriverID Tab
Click Admin from the left-hand navigation bar of the Fleet Tracking Portal.
Then click DriverIDs. The DriverIDs tab displays.
Viewing & Managing DriverIDs
Assigned Tab
The DriverIDs tab presents data for assigned drivers in a table format. This table includes the DriverID/Driver PIN, the driver reference number (RefID), and the number of times the DriverID was used throughout the week.
You can sort each column (except the Actions column) in ascending or descending order by clicking on the Ascending arrow or the Descending arrow , respectively. You may also search the data using the Search field .
From the Assigned tab, you can assign or unassign a DriverID.
Assigning a DriverID
https://vimeo.com/1078697010?share=copy
From the Assigned tab of Admin: DriverIDs, click + Assign DriverID (left side of the Search field).
The Assign DriverID pop-up appears.
Use the drop-down under Driver to select a driver. Note: If you cannot find a driver or the driver has not yet been created in the system, you can create a new driver by clicking + Create Driverand following the prompts.
Use the drop-down under DriverID to select an ID.
Click Assign.
The assigned DriverID appears in the table on the Assigned tab.
Unassigning a DriverID
https://vimeo.com/1078698568?share=copy
From the Assigned tab of Admin: DriverIDs, locate the DriverID you would like to unassign by scrolling through the table or using the Search field.
From the Actions column, click Unassign in the corresponding row of the DriverID you would like to unassign.
A pop-up appears asking you to confirm you would like to unassign the driver named in the pop-up.
Click Yes to unassign or click No to exit without making any changes.
The unassigned DriverID is removed from the Assigned tab table and appears in the Unassigned tab table.
Unassigned Tab
You can view unassigned DriverID devices that are unassociated with a driver, but have been used to log in to one or more vehicles. This tab presents data in table format, providing the DriverID, vehicle, logins (number of times the ID device was used to log in to a vehicle while unassigned), last login, and the current driver (who is currently assigned to the vehicle that the unassigned fob was most recently used on).
The Current Driver column serves as a reference to help identify who is currently or was most recently assigned to a vehicle. This can be useful if a fob isn’t working, allowing the admin to reassign it to the correct driver or understand who last used it before it became unassigned.
You can sort each column (except the Actions column) in ascending or descending order by clicking on the Ascending arrow or the Descending arrow , respectively. You may also search the data using the Search field .
From the Unassigned Tab, you can assign a DriverID to a driver.
Assigning a DriverID
From the Unassigned Tab of Admin: DriverIDs, locate the DriverID you would like to unassign by scrolling through the table or using the Search field.
From the Actions column, click Assign DriverID. The Assign Driver to DriverID pop-up appears.
Use the drop-down under Driver to select the driver you would like to assign to the DriverID device.
Click Assign.
The DriverID is assigned to the selected driver.
[post_title] => Using the Admin: DriverIDs Tab
[post_excerpt] =>
[post_status] => publish
[comment_status] => closed
[ping_status] => closed
[post_password] =>
[post_name] => using-the-admin-driverid-tab
[to_ping] =>
[pinged] =>
[post_modified] => 2025-05-06 09:12:06
[post_modified_gmt] => 2025-05-06 16:12:06
[post_content_filtered] =>
[post_parent] => 26617
[guid] => https://help.gpsinsight.com/?post_type=documentation&p=32318
[menu_order] => 0
[post_type] => documentation
[post_mime_type] =>
[comment_count] => 0
[filter] => raw
)
[10] => WP_Post Object
(
[ID] => 32313
[post_author] => 12
[post_date] => 2025-04-01 12:58:05
[post_date_gmt] => 2025-04-01 19:58:05
[post_content] => The Landmark Groups page allows you to add a landmark group, manage existing landmark groups, and shows a list of your account's existing landmark groups providing the following information in sortable (ascending/descending) columns:
Select Landmarks (Use the search field or locate the vehicle(s) in the list and check the corresponding checkbox).
Fields denoted with an asterisk (*) are required.
Click Save.
If successful, a pop-up window appears confirming the landmark group has been created.
To edit a landmark group:
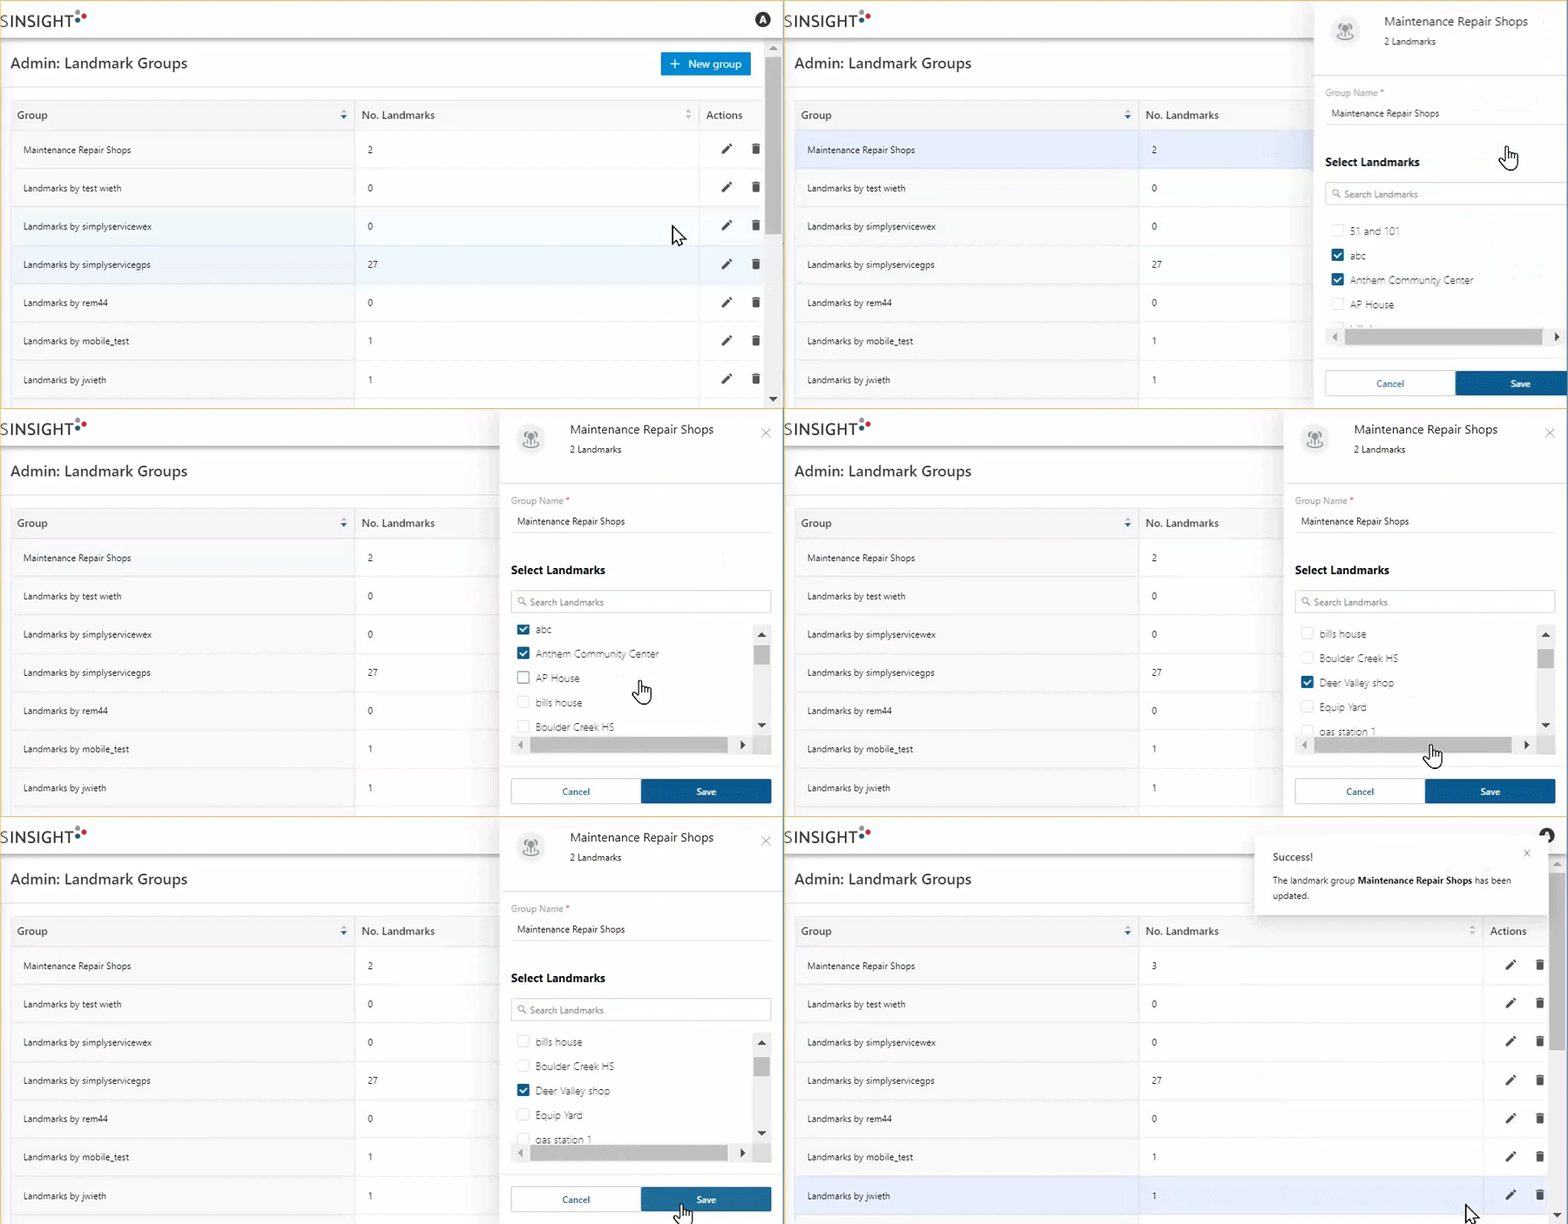
From the Landmark Groups page, under the "Actions" column, click on the Edit icon ().
The Landmark Group Card appears.
Make your edits to the Group Name and/or selected landmarks.
Click Save.
If successful, a pop-up window appears confirming edits to the landmark group have been saved.
Deleting a Landmark Group
You can delete vehicle groups individually from the Landmark Groups page.
To delete a landmark group:
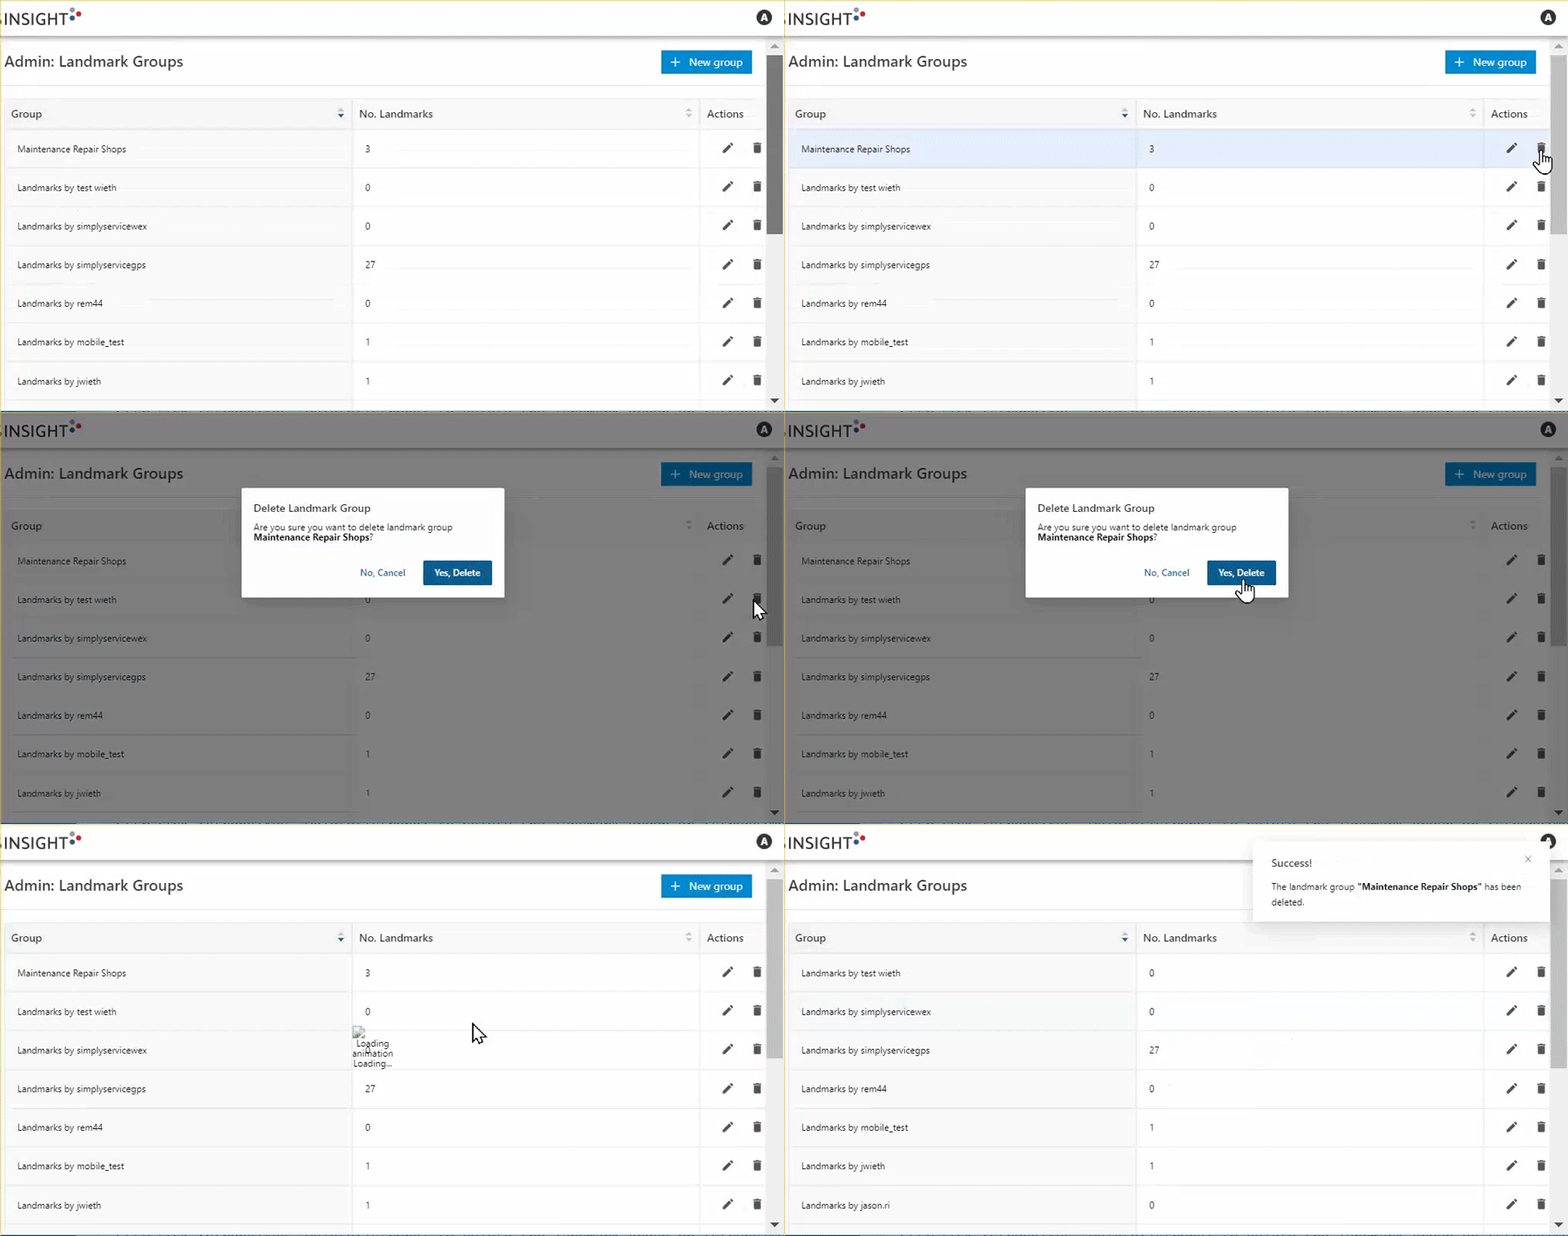
From the Vehicle Groups page, under the "Actions" column, click on the Delete icon ().
The Delete Landmark Group pop-up appears asking you to confirm you would like to delete the selected landmark group.
Click Yes, Delete to delete the landmark group or No, Cancel to exit without making any changes.
If successful, a pop-up window appears confirming the landmark group has been deleted.
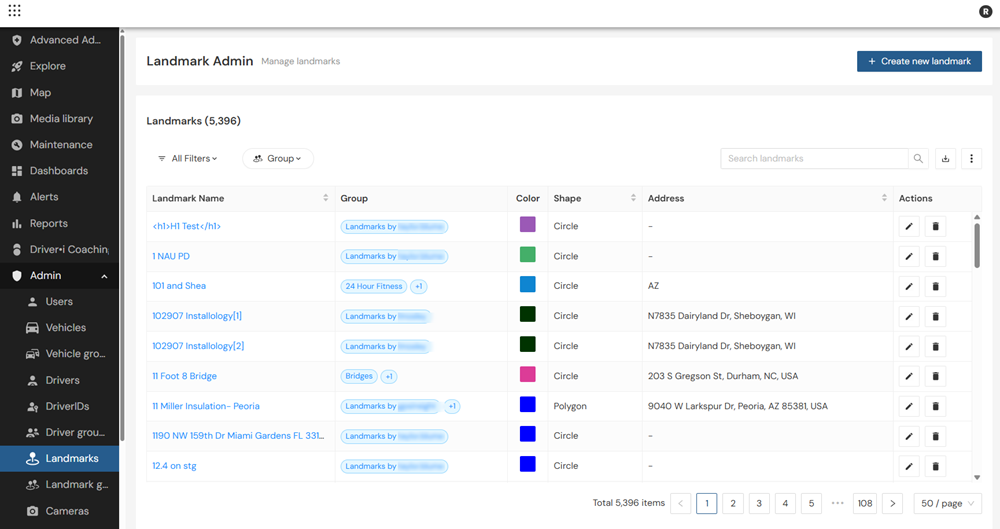
The Landmark Admin tab gives you a centralized view of all your landmarks in one easy-to-use table. From here, you can search, sort, and filter your landmark list, select any landmark to view its details, and create or edit landmarks directly — including their name, address, area, color, and group. You can also export the table contents via a .csv file.
This article walks you through how to navigate the Landmark Admin tab and manage your landmarks with ease.
Viewing the Admin: Landmark Tab
Your landmarks are displayed in a configurable, sortable table format showing Landmark Name, Group, Color, Shape, and Address columns. You can configure your view by adding or removing table columns or adjusting the number of landmarks displayed per page.
The Landmark Name, Shape, and Address columns can be sorted (ascending or descending alphabetically).
Configuring the Table
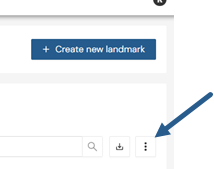
You can edit the table to see the data most important to you using Edit Table Columns. Click the Overflow button to access the Edit Table Columns panel.
The following columns are available:
Landmark Name* (cannot be removed)
Group*
Color*
Shape*
Address*
Lat/Lon
*Shown by default
Check the box next to the columns you would like to view and click Save.
Adjusting the Number of Landmarks per Page
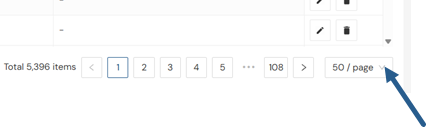
You can adjust how many landmarks are shown per page (25, 50, 100, 200) using the drop-down at the bottom right.
Searching the Table
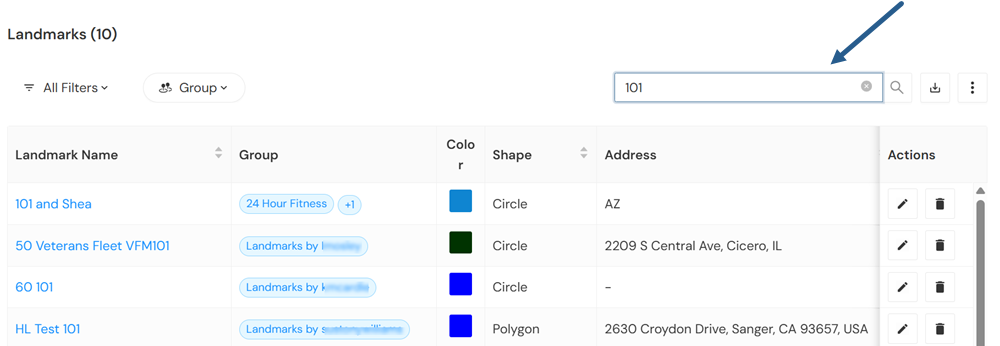
You can easily search for a Landmark in the table using the Search field. Start typing in the field, and the system will automatically begin narrowing the table data to fit your entered search.
Filtering the Table
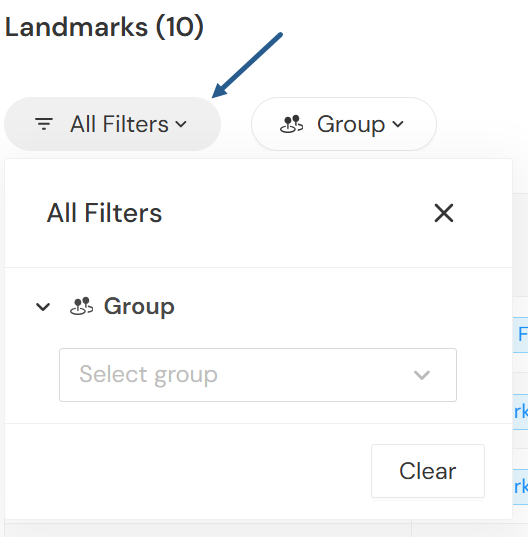
Filters can be used to display the Landmark data you need to see using the Filter drop-down. Available filters are limited to Group.
To apply a filter(s), simply click the down arrow to expand the filter drop-down and check the box next to the applicable filter(s). Checked filters will be automatically applied to the table.
To remove a filter(s), you can use the filter drop-down to uncheck the box next to the applicable filter(s), or click the X to the right of the filter drop-down to clear all applied filters.
Note:You can click the X next to an applied Group filter.
Downloading a .CSV
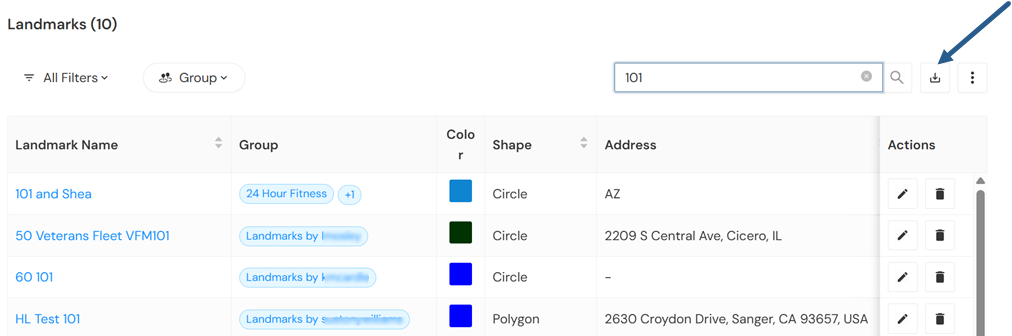
You can download a .csv file of the table’s current content/display by clicking the Download button.
Managing Landmarks
With a centralized view of your landmarks, you can easily manage your landmarks from the Admin: Landmark tab. Any changes made to landmarks from this tab are reflected on the Map page and in Advanced Administration.
From the Admin: Landmark tab, click + Create new landmark.
The Create landmark panel appears on the right-hand side of the screen.
You can use the Search field to find a location, which will auto-populate the fields (except for Landmark Name), enter Lat/Long coordinates, or complete the address fields (Street Address, City, State, County, Zip) manually.
Note: If you enter Lat/Long coordinates, you can click View suggested address to populate the address fields.
Enter the Landmark radius and select the measurement type (Feet, Meters) using the drop-down.
Note: Default radius is 750 feet.
The Area field will populate automatically after your entry if you select Circle as your landmark shape.
Select Polygon or Circle as your Shape.
Note: If you select Polygon, you start drawing by double-clicking on the map, then adjust the shape with the sizing handles. Polygon landmarks can have up to 256 vertices and are often used when you need more exact inclusion/exclusion boundaries, such as alerts for vehicles entering or exiting a location. There is no default radius. The Area field will populate automatically after you have createed your shape.
Use the drop-down for the Color field to select your landmark color. You can enter a hex code for a specific color if you don't see your preferred color in the available options.
(Optional) Click Additional details to display the Groups field and select applicable groups for the landmark.
Click + Create landmark.
If successful, a pop-up window appears at the top-right corner of the screen confirming the landmark has been created.
From the Admin: Landmark tab, locate the landmark you would like to edit using the Search field or manually locating it from the table.
Click the Edit icon under the Actions column, or you can click the Landmark Name, then click Edit.
The Edit landmark panel appears on the right-hand side of the screen.
Make your edits, then click Save changes.
If successful, a pop-up window appears at the top-right corner of the screen confirming the changes have been saved.
Deleting a Landmark
https://vimeo.com/1222757026
From the Admin: Landmark tab, locate the landmark you would like to delete using the Search field or manually locating it from the table.
Click the Delete icon under the Actions column, or you can click the Landmark Name, click the Overflow (three vertical dots) icon, then click Delete landmark from the menu.
The Delete Landmark pop-up appears.
Click Yes, Delete to delete the landmark or click No, Cancel to exit without deleting the landmark.
If successful, a pop-up window appears at the top-right corner of the screen confirming the landmark has been deleted.
Using the Landmark Details Panel
After clicking on a landmark name from the table, the Landmark Details panel appears on the right-hand side of the screen.
This panel offers the same actions on the Admin: Landmark tab as it does when accessed from the Map page. You can view details or select to
Edit: Opens the Edit landmark panel so you can make applicable edits.
Send a dispatch: Send a dispatch to the landmark to selected receipient(s). Option to add additional locations.
View history: Opens the History tab of the Map page and prompts you to select a time range for which you'd like to view asset/vehicle activity within the landmark for the selected time.
Copy address: Copies the address information to your clipboard. Only available if address information is attached to the landmark.
Copy lat/long: Copies the latitude/longitude information to your clipboard.
Open in Google Maps: Opens a separate browser tab with the landmark location open in Google Maps.
Delete the landmark: Prompts you to confirm you'd like to delete the landmark as described in the Deleting a Landmark section above.
[post_title] => Using the Admin: Landmark Tab
[post_excerpt] =>
[post_status] => publish
[comment_status] => closed
[ping_status] => closed
[post_password] =>
[post_name] => using-the-admin-landmark-tab
[to_ping] =>
[pinged] =>
[post_modified] => 2026-09-08 10:08:36
[post_modified_gmt] => 2026-09-08 17:08:36
[post_content_filtered] =>
[post_parent] => 0
[guid] => https://help.gpsinsight.com/?post_type=documentation&p=34482
[menu_order] => 0
[post_type] => documentation
[post_mime_type] =>
[comment_count] => 0
[filter] => raw
)
[12] => WP_Post Object
(
[ID] => 32311
[post_author] => 12
[post_date] => 2025-04-01 12:55:32
[post_date_gmt] => 2025-04-01 19:55:32
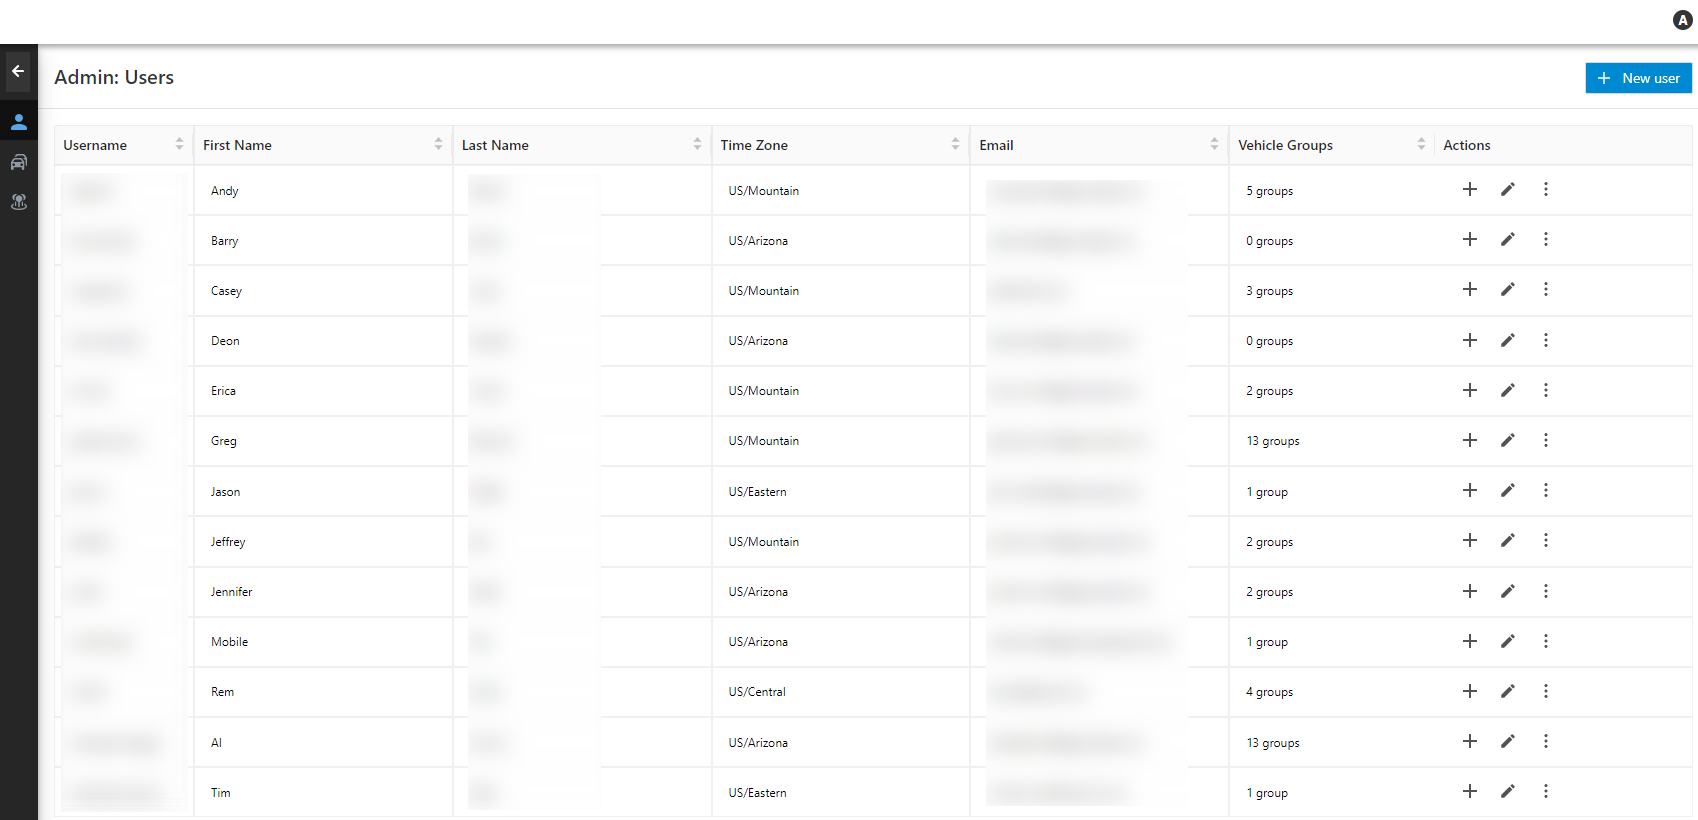
[post_content] => The Users page allows you to add users, manage existing users, and shows a list of your account users providing the following information in sortable (ascending/descending) columns:
Username
First name
Last name
Time zone
Email
Vehicle Groups
To sort the columns by ascending or descending order, click on the up (ascending) or down (descending) arrows in the column header.
Adding a New User
From the Users page, you can add a new user.
To add a new user:
From the Users page, click + New user.
The New User card appears.
Enter the following information:
Username*
Email*
First Name*
Last Name*
Phone
Address
City
State (Use the drop-down to select)
Zip
Country (Use the drop-down to select)
Timezone
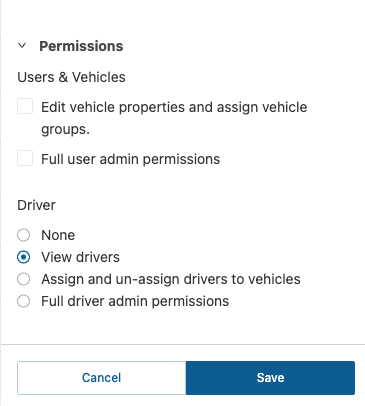
Use the check boxes to select Users & Vehicles permissions (if applicable): Vehicle Admin (Edit vehicle properties and assign vehicle groups) or User (Full permission to edit all users on the account)
If you have the Driver Management Add-on enabled for your account, you can select Driver permissions for a user: None, View drivers, Assign and un-assign drivers to vehicles, Full driver admin permissions (View, assign, and un-assign drivers).
Vehicle Groups (Use the drop-down to select)
Fields denoted with an asterisk (*) are required.
Click Create.
If successful, a pop-up window appears confirming the user has been created.
Adding a User to a Vehicle Group
For existing users, you can add the user to a vehicle group. Adding the user to a vehicle group allows the user to see the vehicle group on the Map page.
How to add a user to a vehicle group:
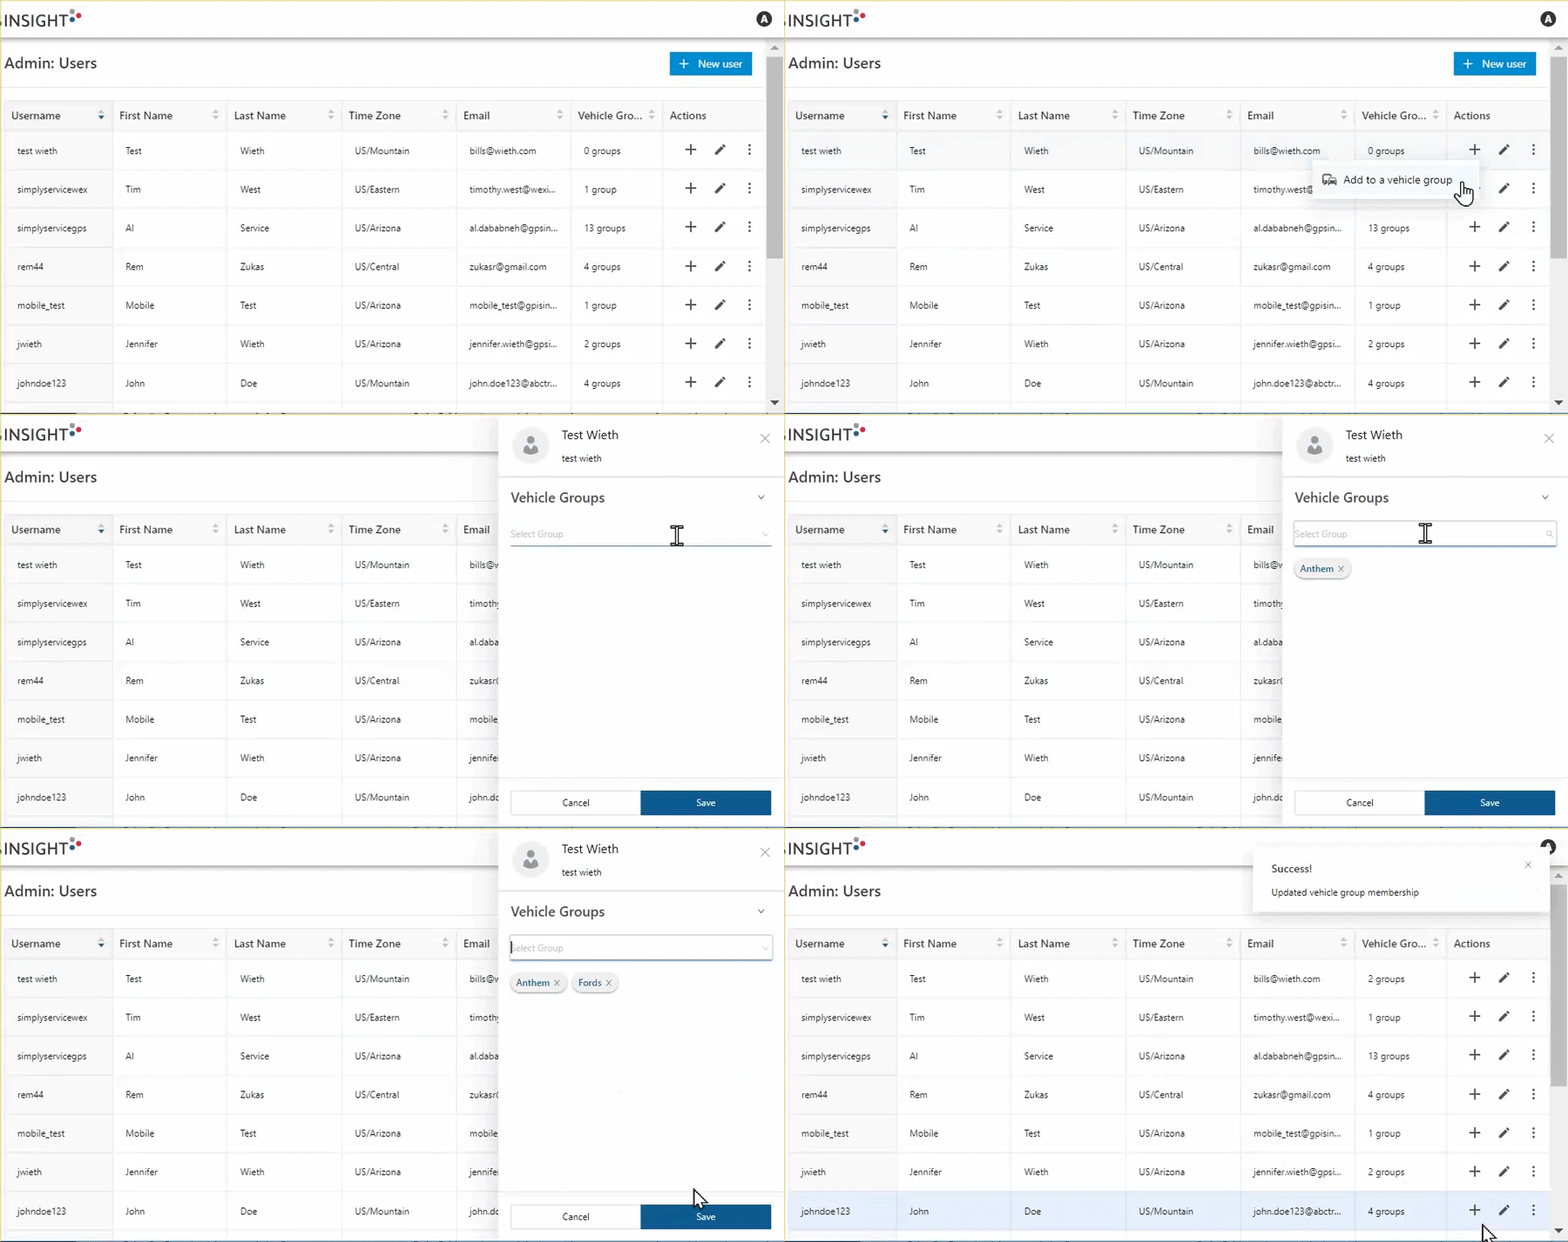
From the Users page, click the add icon (+) under the Actions column.
The "Add to a vehicle group" option appears.
Click Add to a vehicle group.
Select the vehicle group you would like to add to the user using the drop-down list or the search feature.
You can add more than one.
Click Save.
If successful, a pop-up window appears confirming the vehicle group has been added to the user.
Editing a User
For existing users, you can edit the user.
How to edit a user:
From the Users page, click on the Edit icon () under the Actions column corresponding to the user you would like to edit.
The User Card appears.
Make your edits and then click Save.
You cannot edit Username. Additionally, if you have the Driver Management Add-on enabled for your account, you can adjust Driver permissions for a user: None, View drivers, Assign and un-assign drivers to vehicles, Full driver admin permissions (View, assign, and un-assign drivers).
If successful, a pop-up window appears confirming the edits have been saved.
Deleting a User and Other Actions
For existing users, you can reset a user's password, resend a welcome email, and delete a user using the three dots icon () provided in the Actions column.
How to reset a user's password:
From the Users page, click on the Three Dot icon () under the Actions column.
Click Reset password.
A pop-up appears asking you to confirm you would like to reset the user's password.
Click Yes, Send Reset Password Email to reset the user's password or No, Cancel to exit without resetting the password.
If you selected to reset the password, a pop-up will appear confirming the email to reset the password was sent successfully.
How to resend a welcome email:
From the Users page, click on the Three Dot icon () under the Actions column.
Click Send welcome email.
A pop-up appears asking you to confirm you would like to send a welcome email to the user.
A temporary password will also be sent to the user.
Click Yes, Send Welcome Email to resend the welcome email or No, Cancel to exit without sending the email.
If you selected to resend the welcome email, a pop-up will appear confirming the email was sent successfully.
How to delete a user:
From the Users page, click on the Three Dot icon () under the Actions column.
Click Delete user.
A pop-up appears asking you to confirm you would like to delete the user.
Click Yes, Delete to delete the user or No, Cancel to exit without deleting the user.
If you selected to delete the user, a pop-up will appear confirming the user was deleted successfully.
[post_title] => Using the Admin: Users Tab
[post_excerpt] =>
[post_status] => publish
[comment_status] => closed
[ping_status] => closed
[post_password] =>
[post_name] => using-the-admin-users-tab
[to_ping] =>
[pinged] =>
[post_modified] => 2025-04-01 12:56:34
[post_modified_gmt] => 2025-04-01 19:56:34
[post_content_filtered] =>
[post_parent] => 26617
[guid] => https://help.gpsinsight.com/?post_type=documentation&p=32311
[menu_order] => 1
[post_type] => documentation
[post_mime_type] =>
[comment_count] => 0
[filter] => raw
)
[13] => WP_Post Object
(
[ID] => 32312
[post_author] => 12
[post_date] => 2025-04-01 12:59:24
[post_date_gmt] => 2025-04-01 19:59:24
[post_content] => The Vehicle Groups page allows you to add a new vehicle group, manage existing vehicle groups, manage shared public map links, and shows a list of existing vehicle groups providing the following information in sortable (ascending/descending) columns:
Group
Number of Vehicles
The ALL VEHICLES vehicle group is listed by default in the existing vehicle groups. The ALL VEHICLES vehicle group cannot be edited or deleted.
Adding a New Vehicle Group
From this page, you can add a new vehicle group.
How to add a new vehicle group:
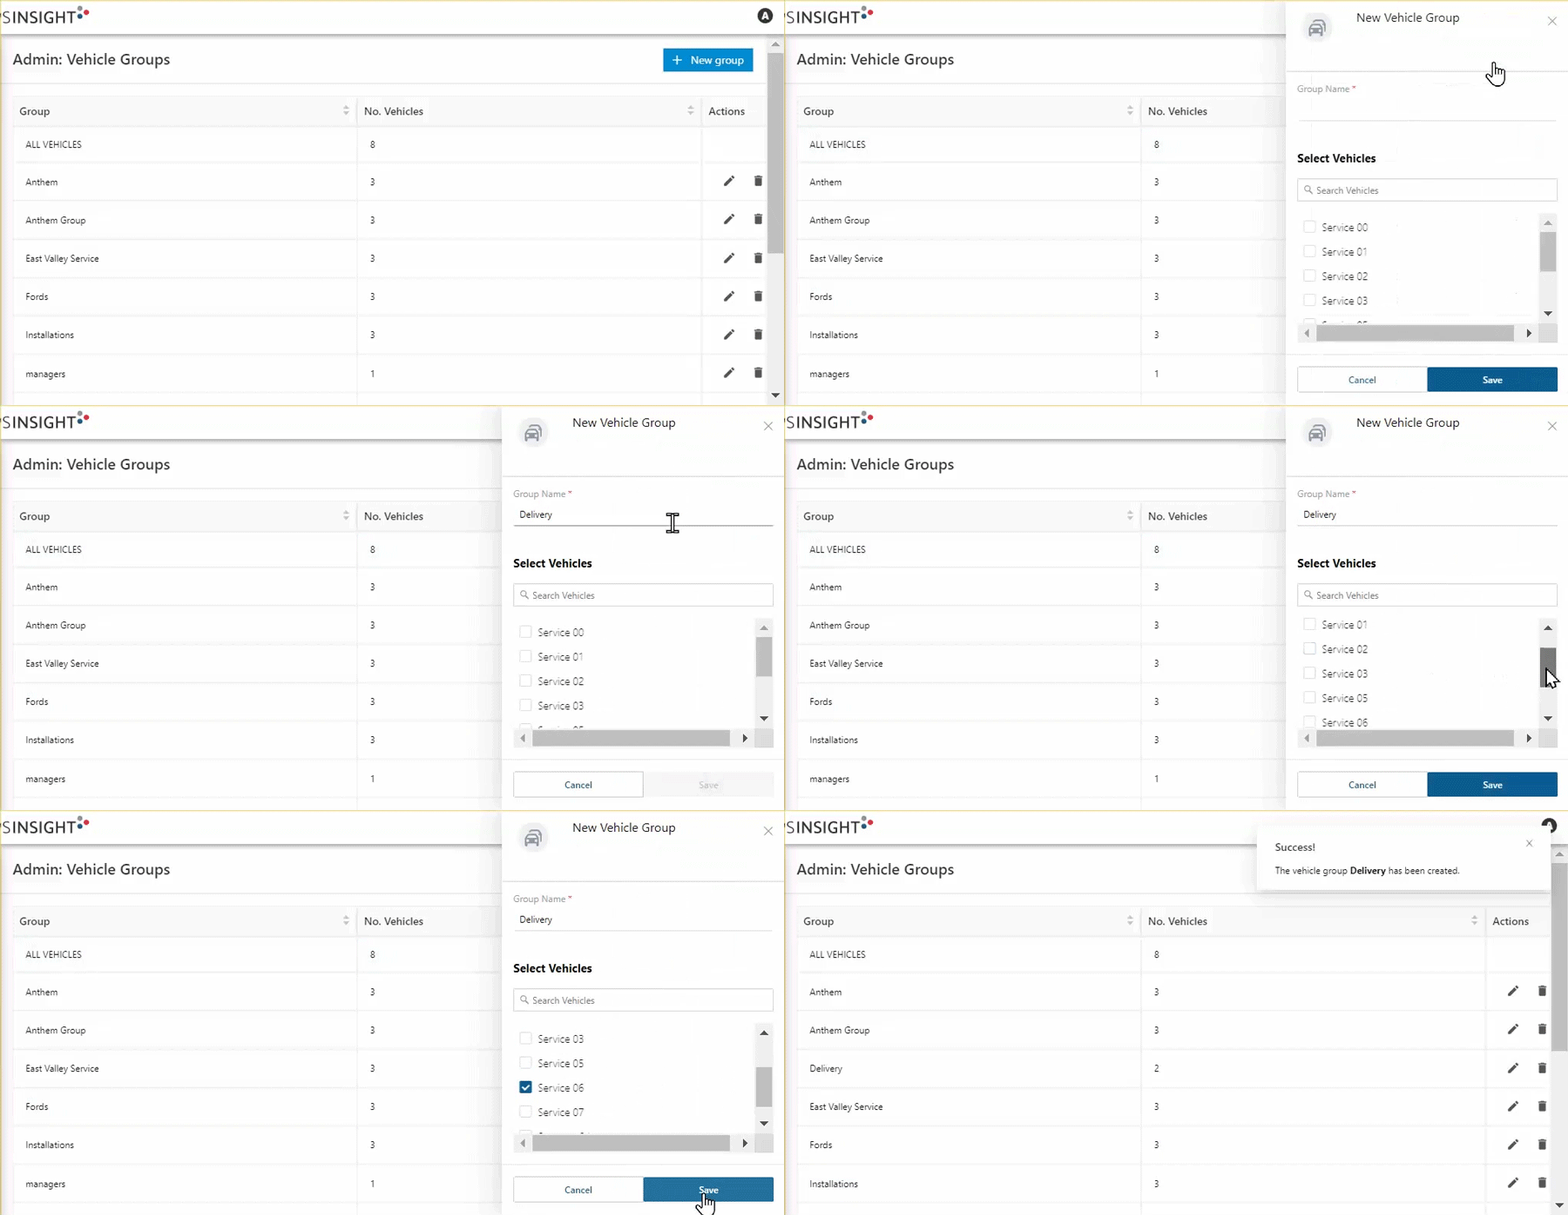
From the Vehicle Groups page, click + New group.
The New Vehicle Group card appears.
Enter the following information:
Group Name*
Select Vehicles (Use the search field or locate the vehicle(s) in the list and check the corresponding checkbox).
Fields denoted with an asterisk (*) are required.
Click Save.
If successful, a pop-up window appears confirming the vehicle group has been created.
Editing a Vehicle Group
You can edit vehicle groups individually from the Vehicle Groups page.
The ALL VEHICLES vehicle group cannot be edited.
To edit a vehicle group:
From the Vehicle Groups page, under the "Actions" column, click on the Edit icon ().
The Vehicle Group Card appears.
Make your edits to the Group Name and/or selected vehicles.
Click Save.
If successful, a pop-up window appears confirming edits to the vehicle group have been saved.
Deleting a Vehicle Group
You can delete vehicle groups individually from the Vehicle Groups page.
The ALL VEHICLES vehicle group cannot be deleted.
To delete a vehicle group:
From the Vehicle Groups page, under the "Actions" column, click on the Delete icon ().
The Delete Vehicle Group pop-up appears asking you to confirm you would like to delete the selected vehicle group.
Click Yes, Delete to delete the vehicle group or No, Cancel to exit without making any changes.
If successful, a pop-up window appears confirming the vehicle group has been deleted.
[post_title] => Using the Admin: Vehicle Groups Tab
[post_excerpt] =>
[post_status] => publish
[comment_status] => closed
[ping_status] => closed
[post_password] =>
[post_name] => using-the-admin-vehicle-groups-tab
[to_ping] =>
[pinged] =>
[post_modified] => 2025-08-05 09:30:49
[post_modified_gmt] => 2025-08-05 16:30:49
[post_content_filtered] =>
[post_parent] => 26617
[guid] => https://help.gpsinsight.com/?post_type=documentation&p=32312
[menu_order] => 2
[post_type] => documentation
[post_mime_type] =>
[comment_count] => 0
[filter] => raw
)
[14] => WP_Post Object
(
[ID] => 33109
[post_author] => 12
[post_date] => 2025-10-17 07:41:00
[post_date_gmt] => 2025-10-17 14:41:00
[post_content] =>
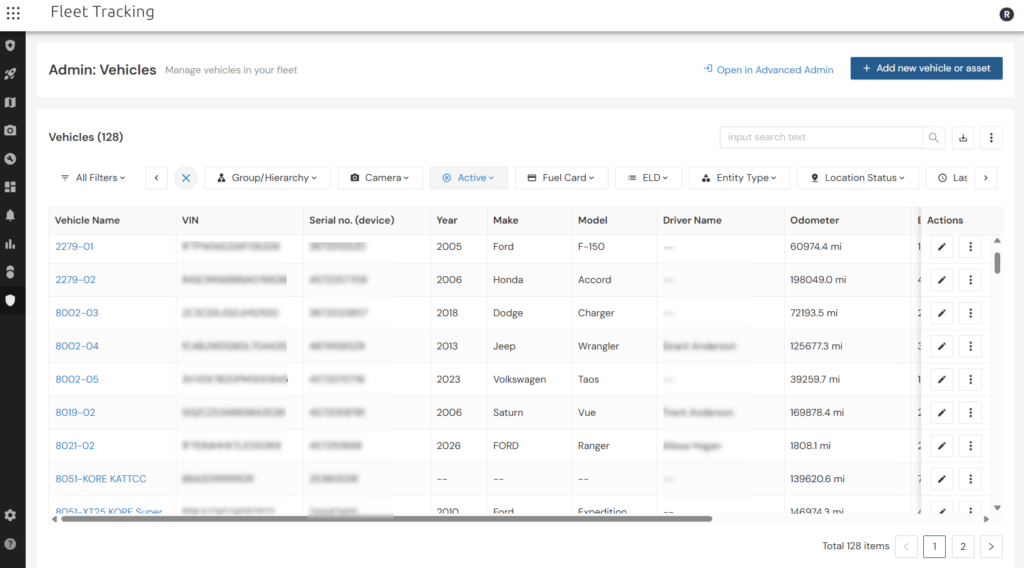
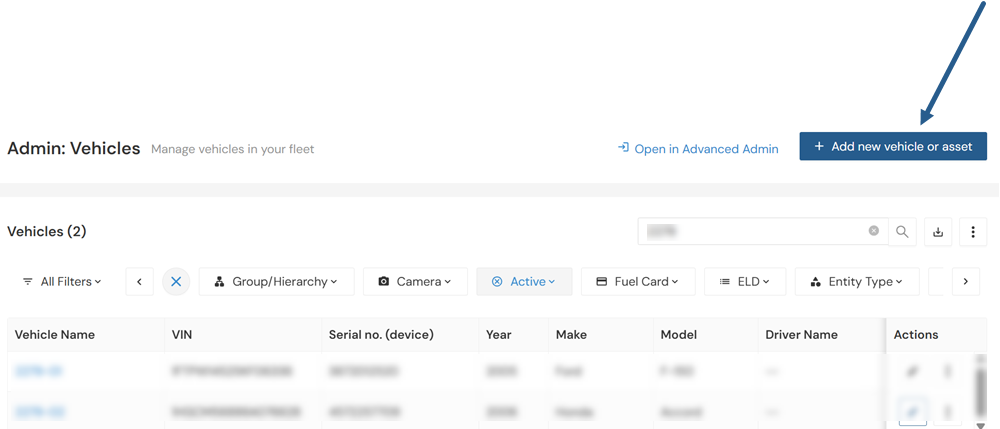
The Admin: Vehicles tab, available from the Admin page of the Fleet Tracking Portal, offers a centralized location to view, search, filter, and edit vehicles with greater speed and accuracy.
Note:A user must have Vehicle Admin permission enabled to access this tab.
In this guide, you’ll learn how to navigate the Vehicle Admin page, use its key tools and filters, and make updates to vehicle information with confidence. Whether you manage a small fleet or a large operation, these instructions will help ensure your fleet data stays organized, accurate, and up to date.
Note: You may use the Open in Advanced Admin button to navigate to the Vehicle Admin page in Classic Portal to manage items such as Attributes, Switch, Diagnostic Data, Driver History, Hierarchy, Vehicle Recall data, etc. This button is only available and accessible to Enterprise/Advanced Administration users.
Viewing the Table
Vehicle information is presented in a default table layout displaying Vehicle Name, VIN, Serial no. (device), Year, Make, Model, Driver Name, Odometer, Engine Hours, ADU: (Average Daily Use), and Last Reported Communication.
Using Table Filters
Filters can be used to display the vehicle data you need to know using the Filter drop-down.
To apply a filter(s), simply click the down arrow to expand the filter drop-down and check the box next to the applicable filter(s). Checked filters will be automatically applied to the table.
To remove a filter(s), you can use the filter drop-down to uncheck the box next to the applicable filter(s), click the X to the right of the filter drop-down to clear all applied filters.
Note:You can click the x next to an applied Device Status filter.
Using the Search field
You can easily search for a vehicle or asset in the table using the Search field. Start typing in the field, and the system will automatically begin narrowing the table data to fit your entered search.
Downloading a .CSV
You can download a .csv file of the table's current content/display by clicking the Download button.
The .csv file will honor any applied filters, searches, or table column adjustments.
Editing Table Columns
You can configure your Admin: Vehicles table by using the Edit Table Columns button.
To edit the table columns, click the Edit Table Columns button, then click the box to check or uncheck a column and click Save. Checked columns will appear on the table.
Note: Column availability is determined by your plan (including add-ons). Example: If you are on the Fleet Essentials plan, you would not be able to view/add the Vehicle Hierarchy column unless you have the Advanced Administration add-on.If you would like to learn more, please contact your Account Manager.
Note: Table column configurations are saved in your browser’s cookies and will stay the same each time you log in, as long as you use the same browser. If you switch to a different browser or computer, your table will reset to the default column configuration.
Managing Entities
You can add a new vehicle or asset, edit a vehicle/asset, and manage devices from the Admin: Vehicle tab.
Adding a New Vehicle or Asset
You can easily create a new vehicle or asset for your fleet from this tab.
How to Add a New Vehicle or Asset
From the Admin: Vehicle tab, click + Add new vehicleor asset.
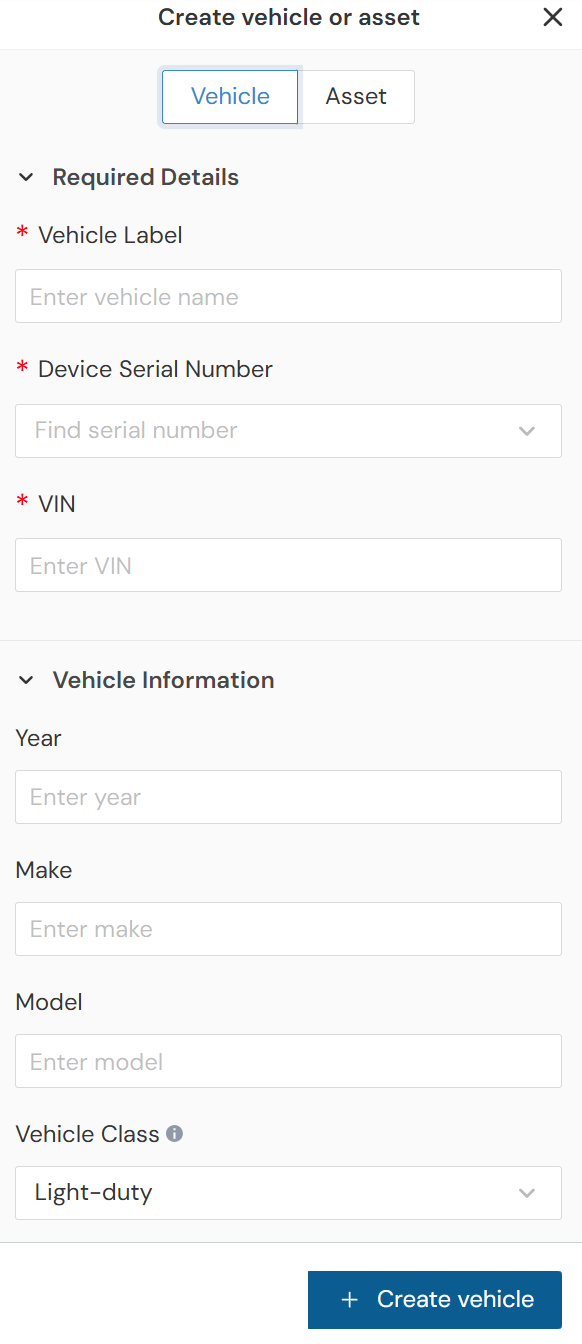
The Create vehicle or asset drawer appears.
Click Vehicle or Asset.
If you've selected Vehicle, in the Details section, complete the following fields for a Vehicle: Note: Fields marked with a red * are required.
Vehicle Label: Enter a name for the vehicle
Device Serial Number: Use the drop-down to locate the device's serial number
VIN: Enter the vehicle's VIN
Year: Enter the vehicle's model year
Make: Enter the vehicle's model make
Model: Enter the vehicle's model
Vehicle Class: Use the drop-down to select light-duty, medium-duty, or heavy-duty Note: This will adjust the g-force sensitivity settings (configuration) of the device.
Color: Enter the color of the vehicle
Icon: Use the drop-down to select an icon to represent the vehicle on the Map page
Country: Use the drop-down to select the country the vehicle is registered in
License State: Enter the vehicle's license plate state
License Plate: Enter the vehicle's license plate's unique combination
In the Mileage, Engine Hours and Fuel section, complete the following fields for a Vehicle: Note: Fields marked with a red * are required.
Odometer: Enter the vehicle's current odometer value
Engine Hours: Enter the vehicle's current engine hours
Engine Size (Liters): Enter the vehicle's engine size (up to 50 liters)
Fuel Type: Use the drop-down to select the type of fuel used for the vehicle
Fuel Capacity (Gallons): Enter the amount of fuel the vehicle's tank can hold (must be a valid number with up to 2 decimal places)
Engine Size: Enter the total volume of all the engine's cylinders in liters
Idle GPH: Enter the gallons per hour used while the vehicle's engine is idling (up to 20 GPH)
In the Vehicle Groups Membership section, click in the "Select group(s)" field to expand the drop-down menu and select applicable membership(s).
In the Hierarchy Memberships section, click in the "Select hierarchies" field to expand the drop-down menu and select applicable membership(s).
In the Contact Info section, complete the following fields:
Phone: Enter the phone number associated with the vehicle's contact
Email: Enter the email associated with the vehicle's contact
Alert Preference: Check the box to select email and/or SMS as the preferred alert type
Click + Create vehicle.
If you've selected Asset, complete the following fields for an Asset: Note: Fields marked with a red * are required.
Asset label: Enter a name for the vehicle
VIN or Serial Number: Enter the asset's VIN or serial number
Year: Enter the asset's model year
Make: Enter the asset's model make
Model: Enter the asset's model
Color: Enter the asset's color
Icon: Use the drop-down to select an icon to represent the asset on the Map page
Country: Use the drop-down to select the country the vehicle is registered in
License State: Enter the vehicle's license plate state
License Plate: Enter the vehicle's license plate's unique combination
Device serial number: Use the drop-down to select the serial number of the device with which the asset is equipped
Odometer: Enter the asset's current odometer value
Engine Hours: Enter the asset's current engine hours
Fuel Type: Use the drop-down to select the type of fuel used for the asset
Fuel Capacity (Gallons): Enter the amount of fuel the asset's tank can hold (must be a valid number with up to 2 decimal places)
Engine Size: Enter the total volume of all the engine's cylinders in liters
Idle GPH: Enter the gallons per hour used while the asset's engine is idling (up to 20 GPH)
Phone: Enter the phone number associated with the vehicle's contact
Email: Enter the email associated with the vehicle's contact
Alert Preference: Check the box to select email and/or SMS as the preferred alert type
In the "Asset groups" section, click in the "Select group(s)" field to expand the drop-down menu and select applicable membership(s).
In the "Asset hierarchies" section, click in the "Select hierarchies" field to expand the drop-down menu and select applicable membership(s).
Click + Create and register asset.
Managing Vehicles & Devices
From the Actions column of the Admin: Vehicles tab, you can edit a vehicle and/or make changes to a vehicle's or asset's device.
Note: Not all accounts include the ability to deactivate, swap, or transfer devices. If you don’t see these options, it may be due to your contract terms. Please contact your Account Manager for details.
How to Edit a Vehicle
From the Admin: Vehicle tab, locate the row of the vehicle/asset you would like to edit in the table and click the Edit icon under the Actions column in that row.
The Edit vehicle/asset drawer appears.
Make your changes in the corresponding available fields. Note: You cannot edit the vehicle's device serial number. This field will be greyed out.
Click Save changes.
How to Configure a Device
From the Admin: Vehicle tab, locate the row of the vehicle you would like to edit in the table and click the Overflow icon under the Actions column in that row.
Click Configure Device from the options shown.
The Configure device drawer appears.
You can create a new device configuration, selecting from your current list, or customizing a configuration for the device as a "one-off."
Creating a New Configuration:
Click + Create new.
An Add new configuration pop-up appears.
Under Configuration name, enter a name for the new configuration. This field is required.
Enter thresholds for applicable Violation types using the up/down arrows or manual entry.
Click + Add.
You can then select the newly created configuration from the list (see the 'Selecting from List' steps below).
Selecting from List:
Ensure the "Select from list" option is selected under Configuration.
Use the drop-down menu to locate the configuration you would like to apply to the vehicle's device, and then click to select it.
Click Apply config.
Customizing the Configuration:
Click the button next to "Customize this device."
Enter thresholds for applicable Violation types using the up/down arrows or manual entry.
Click Apply config.
How to Deactivate a Device
From the Admin: Vehicle tab, locate the row of the vehicle you would like to edit in the table and click the Overflow icon under the Actions column in that row.
Click Deactivate Device from the options shown.
The Deactivate vehicle drawer appears, asking you to select an option from the drop-down list for your reason for deactivating.
Use the drop-down to select the reason.
Under Type, select whether the device is purchased or a rental using the button next to the applicable type.
Click Deactivate device.
A pop-up appears asking you to confirm you'd like to deactivate the vehicle.
Click Yes, Deactivate to deactivate the vehicle or No, Cancel to exit the pop-up.
If you clicked Yes, Deactivate, a pop-up appears confirming that the request has been submitted. An email is sent to you with additional directions.
How to Swap a Device
You can swap a device from the Admin: Vehicles tab. Swap allows users to quickly swap a new device serial number into an existing vehicle/asset registration. This feature is valuable for instances where devices are upgraded or replaced through Return Authorization.
From the Admin: Vehicle tab, locate the row of the vehicle you would like to edit in the table and click the Overflow icon under the Actions column in that row.
Click Swap Device from the options shown.
The Swap device drawer appears.
Use the drop-down to select a new device serial number.
Use the check box under Copy Vehicle Profile to copy any group/tree memberships, attributes, inputs, alerts, scheduled reports, and current driver assignments to the new device. Note: If this box is not checked, none of the above data is copied over to the new device, and if required, will need to be entered again.
Click Swap device.
A pop-up appears asking you to confirm you would like to swap the device.
Click Yes, Swap. Note: Swapping a device requires action from the Support team. The Swap Form in the portal automatically notifies Support of the request. Support will notify you when your swap request is complete. Please note that devices remain on the account until the end of the month. Request by the 26th of each month to avoid an additional month of billing.
How to Transfer a Device
You may transfer a device to a different vehicle. This may be helpful if you are retiring the vehicle from the fleet or if you are rotating vehicles based on seasonal/situational use.
Note: Transferring a device to another vehicle requires you to register the device to another vehicle immediately after making the selection to transfer.
From the Admin: Vehicle tab, locate the row of the vehicle you would like to edit in the table and click the Overflow icon under the Actions column in that row.
Click Transfer Device from the options shown.
The Transfer device drawer appears.
As you are required to register the device, enter the following information: Note: Fields marked with a red * are required.
Vehicle Label
VIN
Year
Make
Model
Color
Icon (Use the drop-down to make a selection)
Country (Use the drop-down to make a selection)
License State (Use the drop-down to make a selection)
License Plate
Odometer
Engine Hours
Fuel Type
Fuel Capacity
Engine Size (L)
Idle GPH
Click Transfer.
A pop-up appears asking you to confirm you would like to transfer the device.
Click Yes, Transfer.
If successful, a pop-up appears confirming the device has been successfully transferred.
[post_title] => Using the Admin: Vehicles Tab
[post_excerpt] =>
[post_status] => publish
[comment_status] => closed
[ping_status] => closed
[post_password] =>
[post_name] => using-the-admin-vehicles-tab
[to_ping] =>
[pinged] =>
[post_modified] => 2026-09-30 13:08:47
[post_modified_gmt] => 2026-09-30 20:08:47
[post_content_filtered] =>
[post_parent] => 26617
[guid] => https://help.gpsinsight.com/?post_type=documentation&p=33109
[menu_order] => 0
[post_type] => documentation
[post_mime_type] =>
[comment_count] => 0
[filter] => raw
)
[15] => WP_Post Object
(
[ID] => 30957
[post_author] => 12
[post_date] => 2024-06-21 08:12:16
[post_date_gmt] => 2024-06-21 15:12:16
[post_content] => The Driver Groups page is available from the Admin page in the Fleet Tracking Portal. From the Driver Groups page, you can view, add, and manage your driver groups.
The Driver Groups page displays your driver groups in a table format offering at-a-glance high-level information such as driver group name and the number of drivers included in each driver group. The Group and No. Drivers columns are sortable by using the Ascending and Descending arrows. You can perform actions such as editing or deleting a driver group from the Actions column.
Adding a Driver Group
How to add a driver group:
From the Driver Groups page, click + New group (top-right corner of the page).
The New Driver Group panel appears on the left-hand side of the browser window.
Under Group Name, enter a name for the driver group.
Under Select Drivers, use the search field or the list to locate driver(s) and check the box next to the driver(s) you would like to include in the driver group.
Click Save.
A message appears in the top-right corner of the browser window to confirm if your driver group was successfully added.
Editing a Driver Group
How to edit a driver group:
You cannot edit the ALL DRIVERS group from your account.
From the Driver Groups page, click the Edit icon () from the Actions column.
The Driver Group panel appears on the left-hand side of the browser window.
Make your edits (add/remove drivers or edit Group Name).
Click Save.
A message appears in the top-right corner of the browser window to confirm if your driver group was updated successfully.
Deleting a Driver Group
How to delete a driver group:
You cannot delete the ALL DRIVERS group from your account.
From the Driver Groups page, click the Trash icon () from the Actions column.
The Delete Driver Group pop-up appears asking you to confirm you would like to delete the applicable driver group.
Click Yes, Delete to delete the driver group or No, Cancel to exit the pop-up without deleting the driver group.
A message appears in the top-right corner of the browser window to confirm if your driver group was deleted successfully.
[post_title] => Using the Driver Groups Page
[post_excerpt] =>
[post_status] => publish
[comment_status] => closed
[ping_status] => closed
[post_password] =>
[post_name] => using-the-driver-groups-page
[to_ping] =>
[pinged] =>
[post_modified] => 2025-11-14 11:39:29
[post_modified_gmt] => 2025-11-14 18:39:29
[post_content_filtered] =>
[post_parent] => 26617
[guid] => https://help.gpsinsight.com/?post_type=documentation&p=30957
[menu_order] => 0
[post_type] => documentation
[post_mime_type] =>
[comment_count] => 0
[filter] => raw
)
)
[post_count] => 16
[current_post] => -1
[before_loop] => 1
[in_the_loop] =>
[post] => WP_Post Object
(
[ID] => 31997
[post_author] => 12
[post_date] => 2025-02-07 11:17:06
[post_date_gmt] => 2025-02-07 18:17:06
[post_content] =>
The Camera Admin tab, available from the Admin page of the Fleet Tracking Portal, offers a centralized location for performing basic administrative tasks associated with registered Driveri and Drive360/AIR II cameras.
Note: Your account must have active Driveri or Drive360/AIR II cameras, and users must have Camera Admin permissions.
Viewing Camera Devices
Camera devices are listed in a searchable, sortable table showing the vehicle label, the camera device equipped to it, and the device's serial number.
You can use the Search field to quickly locate a specific device.
You can use the Sort Ascending icon and Sort Descending icon available in each column to adjust the display of your camera devices.
Click the corresponding vehicle label under the Vehicle column.
The Camera details panel appears on the right-hand side of the page, offering the following information:
Vehicle label, device name, and device serial number
Overview:
Date/Time of last communication
Camera Settings
Media: All manually requested and auto-generated events associated with the vehicle
Note: Clips are available for 90 days. After 90 days, clips expire and are unavailable. We recommend downloading clips to local storage if you foresee a need for them after an extended period of time.
Click Edit to edit basic camera settings, if applicable.
Click View all media to view all media associated with the vehicle, if applicable.
Downloading a .CSV
You can download a .csv file containing the information available in the Camera Admin tab. The .csv file contains Vehicle, Device, and Serial number columns.
Managing Camera Settings
You can edit record settings (audio, road, driver), blur faces (none, driver, passenger, all) and enable or disable in-cab alerts from the Camera Admin tab.
Note: Any changes made to configurations are processed when the camera is on. If the camera is not on, the configuration change is held until the camera is on.
How to Edit Camera Settings
From the Camera Admin tab, click the Edit icon under the Actions column in the row of the applicable vehicle.
The Edit panel appears.
Under Record, click the checkboxes to adjust your recording settings.
Note: The camera must have a driver-facing camera to select the Driver option.
Use the toggle under In-cab alert to enable In-cab alerts (changes to blue) or disable In-cab alerts (changes to gray).
Click SaveChanges.
Camera Settings for AIR II with Fleet All-in-One Pro Plus
If you have the Fleet All-in-One (FAIO) Pro Plus plan, you can manage additional event settings beyond Record Type and In-Cab Alerts. For Road-Facing Camera Settings and Driver-Facing Camera Settings, you can either use the group toggle to turn recording on or off for all events under each camera type, or use the individual toggles to enable or disable recording for specific events. Please see the AIR II FAQ for event definitions and audio warnings.
Important! Setting changes are processed upon successful transmission to the device when it is in Wake mode. Therefore, if you make a change to settings, please allow for a couple of hours for the update to be enabled and reflected in your account.
Note: If you are interested in AI-based event recordings, please contact your Account Manager for additional information.
G-force Movement Events: All G-force-related events, such as acceleration, deceleration, or hard turns
Road Facing Camera Settings: - Forward Collision Warning (This feature is disabled by default; users with permissions can enable this from the Edit drawer of the Camera Admin tab.) - Close Following - Lane Departure (This feature is disabled by default; users with permissions can enable this from the Edit drawer of the Camera Admin tab.) - Stop Sign - Pedestrian Collision Warning (This feature is disabled by default; users with permissions can enable this from the Edit drawer of the Camera Admin tab.)
Driver Facing Camera Settings: - Drowsiness/Fatigue - Cell Phone Use - Distracted Driving - Seatbelt
Viewing Camera Media
You can view all camera media (manually requested and auto-generated) for a vehicle equipped with a camera.
How to View Camera Media for a Vehicle
From the Camera Admin tab, click the Overflow icon in the row of the applicable vehicle.
The View all media option appears.
Click View all media.
Note: You can also access View all media from the Camera Details panel.
A separate browser tab opens, navigating you to the Camera Media page. The vehicle is automatically selected, and the timeframe displayed defaults to Today. Available clips are shown under the Results list.
Use the Camera Media page filtering options to adjust as necessary.
(Skip this step if you have FAIO Pro Plus). Click Request clip to request a clip from the camera, or click the entry to view the clip if it was requested and transmitted from the camera previously.
The Admin page is a centralized hub for administrative tasks and allows you to view and manage your account users, vehicle groups, drivers/driver groups, landmark groups, and cameras (if applicable) quickly and easily. To view this page, you must have Full User Admin permissions. From the Admin page, you can access the following tabs: Admin:…
Configurable devices use recommended (default) thresholds to alert drivers when certain driving behaviors are detected. These alerts are based on the selected Vehicle Class and include: Vehicle Class Options Note: Vehicle Class only applies to devices that track movement (e.g., XT-25, XT45, etc.). Any vehicles equipped with devices that do not track movement cannot have…
The Application Access feature is available for our Fleet Management customers with the Driveri solution add-on who have enabled Single Sign On (SSO). Please refer to About the App Switcher for details on enabling SSO. Note: Users must have Admin permissions to access the Application Access feature. Viewing Application Access Adding Application Access How to…
Would you like to order more devices for your evolving fleet? Great! You can initiate your order directly from the Fleet Management Portal. You must have Admin permissions to order more devices via the Fleet Management Portal. To Initiate an Order Log in to the Fleet Management Portal with valid Admin user credentials. Navigate to…
From the Explore page of the Fleet Tracking Portal, you can schedule an installation using our partner, Techsbook. This feature is only available to US-based customers. To Schedule an Installation: From the Explore page, click Schedule an Install under the Administration section. A Customer Acknowledgement pop-up appears. Please read the acknowledgment, then click Proceed to…
The Public Map Links feature allows you to create a URL link to view vehicle locations on a map for a specific vehicle group. This enables external visibility of limited vehicle location data, allowing your customers to view real-time positions without requiring a login to the portal. Additionally, you can include a Landmark Group to…
The Landmark Admin tab gives you a centralized view of all your landmarks in one easy-to-use table. From here, you can search, sort, and filter your landmark list, select any landmark to view its details, and create or edit landmarks directly — including their name, address, area, color, and group. You can also export the…


 to quickly locate a specific device.
 and Sort Descending icon
 available in each column to adjust the display of your camera devices.

 under the Actions column in the row of the applicable vehicle.


 in the row of the applicable vehicle.


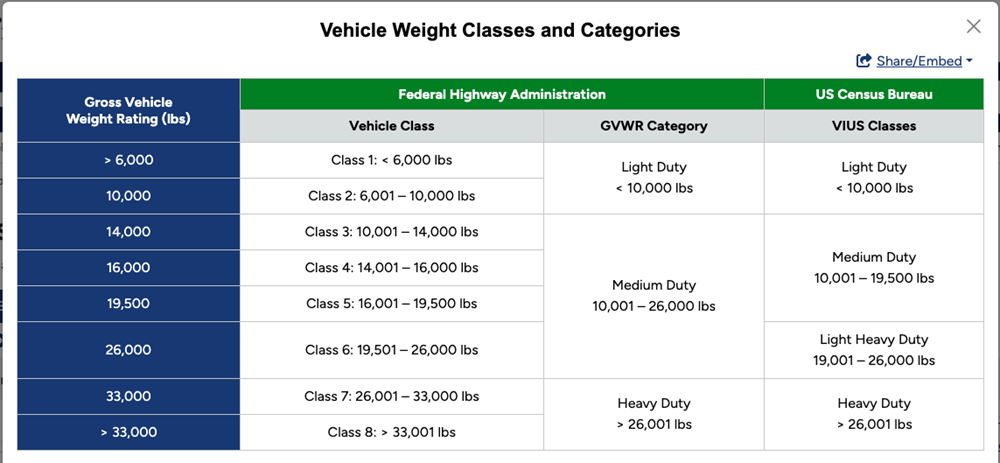


 ).

 ).

 ) to automatically check the box for all vehicles.
 ).


 to copy the URL to your clipboard or click the Edit icon